Modding Your Wynn
- Published August 16, 2025
Sliders are active on this page to save space!
When you see an image, look for
Out of the box, Wynncraft works with unmodified (i.e. vanilla) clients released by Mojang/Microsoft. Yet, despite being perfectly functional, less than 10% of the server’s users play without mods. This figure speaks to the significant improvements in quality of life made possible by the server’s third-party development community over the years.
This article seeks to provide a walkthrough for users from all backgrounds on how to go about modifying your client to best take advantage of Wynncraft’s current 3rd party ecosystem. Note, this is NOT a modpack, but rather, instructions on how to go about choosing and installing Wynn mods, resources, and if need be, packs.
Some General Notes
One cannot make a modding guide without brushing upon some frequently asked questions on the topics of safety and selection. Those will be answered in the collapsed section below. If you have any of those questions (‘is modding safe’, ‘why did you choose x instead of y’, etc.) feel free to expand this section otherwise, if not, this section is safe to ignore.
Some frequently asked questions and rationales for some choices.
Is Modding Safe?
By using 3rd party launcher, launching a 3rd party client wrapper, or loading a 3rd party client modification (listed in descending order of access although all occur in this guide), you are taking an inherent risk. You are trusting the 3rd party with access to execute code on your computer. While the amount of damage it can do varies, that risk remains.
Having said that, there are many checks in place to prevent that from happening. If you use open-source software with large userbases, regardless of the 3rd party themselves, thousands of users have had time to run the application and look for abnormalities. Moreover, technical users have had a chance to look at the code themselves, further ensuring nothing suspicious is occurring. There is still a risk, but it is thoroughly mitigated.
Another mitigation of risk happens when one uses software that has been uploaded to large moderated platforms (such as modrinth and curseforge). In addition to the checks above, these platforms use automated and manual tools to review the submitted code as to make sure it isn’t doing anything it shouldn’t be doing. Again, there is still risk, but this mitigates it further.
Finally, one can install software created by 3rd parties they trust. Even if software has no users, is closed, and/or not on a moderated platform, if one trusts the software’s author, then one can trust the software. This is the rarest and least advisable form of mitigation, but it adds another layer in conjunction with the above (although some risk remains).
The resources suggested by this guide are open sourced, have a reasonable amount of users, and have been posted to moderated platforms. Or, in the case of launchers and wrappers, are open-sourced and used by enough users for the safety concern to be almost completely mitigated in and of themselves. Or, in the case of launchy specifically, open source and released by a team closely connected to Wynn (although that connection remains unofficial; the lead developer for launchy and wynntils is the same as the lead developer for Wynn).
Why does this guide promote x over y?
Fabric v. Forge v. Others
Currently, within the modding system, fabric is the go-to ecosystem for client side modification within server connected contexts. The vast majority of active development, within a Wynncraft context, occurs within the Fabric ecosystem.
This is not to say that there are not alternatives. Many current wynn mods are translated into the (neo)forge ecosystem, which technically remains an option. But this is a worse choice, in general, than just running things in/with fabric since that is the most tested ecosystem and where most active development occurs. The same goes for obscure and/or deprecated ecosystems such as liteloader.
Prism v. Modrinth v. CurseForge v. Others
CurseForge has quickly become a bloated proprietary ecosystem wherein the platform’s foremost priority is no longer its users. Modrinth arose as an alternative to that, although its focus primarily remains the curation and distribution of mods as opposed to launching them (although it has expanded into that vertical). Prism, meanwhile, has received the vast majority of open source development over the past decade (in the form of its upstreams).
It is open source, it is performant, it is intuitive, and it has a very large userbase that results in both security and community support. It is also capable of loading mods and wrappers/apis from the entire ecosystem and is therefore a great starting point. Having said that, both modrinth and prism are valid choices notwithstanding.
Lunar’s support for wynncraft is very outdated and buggy, not to mention incompatible with several key aspects of functionality. For this reason, as with CurseForge, this guide’s authors do not recommend it be used in Wynncraft contexts.
Custom v. Optimized Family v. Skyward Family
This guide recommends the use of a performance modpack as the basis of installations of type two and three. This opposes the common practice of dumping anything with the word “performance” into your mods folder and hoping for the best.
This opposition stems both from the frequency at which performance mods update and the frequent incompatibilities between various performance mods. Without spending time to debug your performance mods as to avoid cases wherein they fight with each other, the best option is to just let someone else do it, in the form of a modpack.
As for the specific choice of performance modpack, currently, the options are between two ecosystems: HyperSoop’s Optimised family of modpacks, and Devin’s Skyward family of modpacks. This article chooses the later family on account of it being open sourced, more communal, more focused, and more targeted.
The Easiest, Quickest, Approach
Would you prefer not to mess around with the dozens of menus needed to create the more advanced installations? Is your computer decent enough as not to need extreme optimisations or skeletal installs? You’ve come to the right place.
This tutorial will walk you through downloading and installing the Wynntils’ Team’s Launchy wrapper. It is a system designed specifically for Wynn, and specifically to simplify modding.
Expand this for more information about how to create a simple launchy install!
Downloading Minecraft
Wynntils Launchy is a wrapper, meaning it is effectively an interface to simplify modding the Official Minecraft Launcher. If you already have the official launcher downloaded and installed, you can skip this step!
If you do not have the Mojang Launcher installed or are unsure, expand this!
Fetching The Exe
First things first, we need to fetch the Minecraft installer from this page!
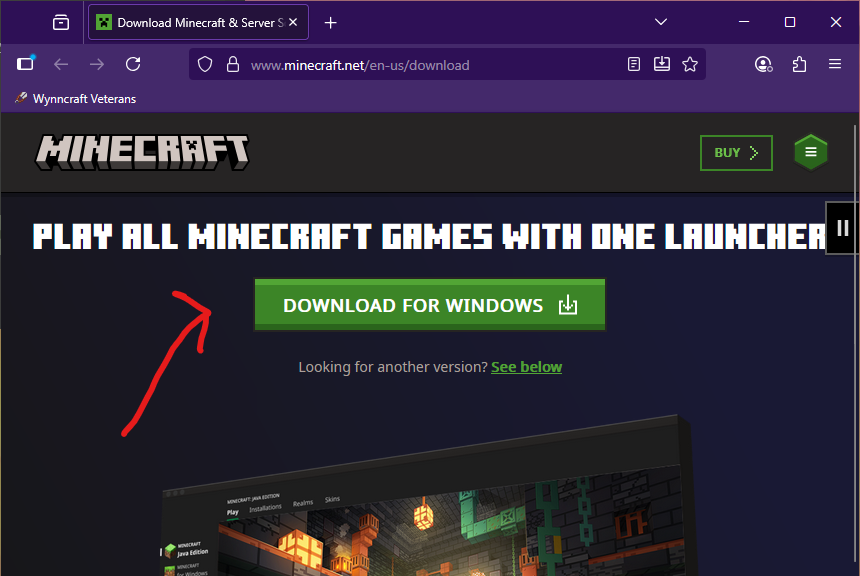
The first thing we will need is the Minecraft Launcher’s exe!
This can be found from this page of the Minecraft Website!
Once you have selected your installer, downloading it should give you a file to click.

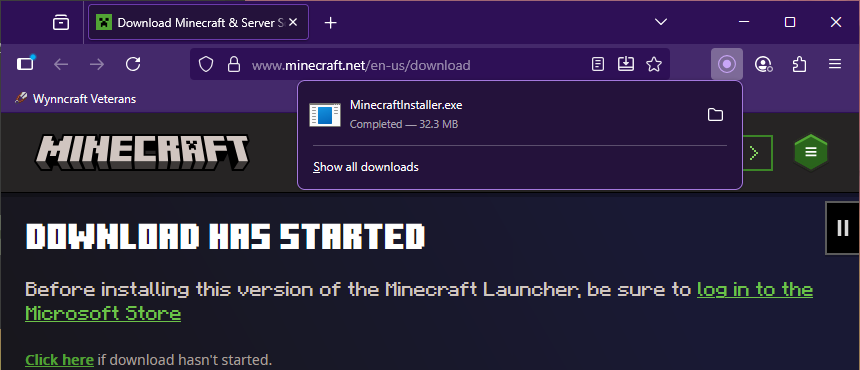
It’s now time to install Minecraft!
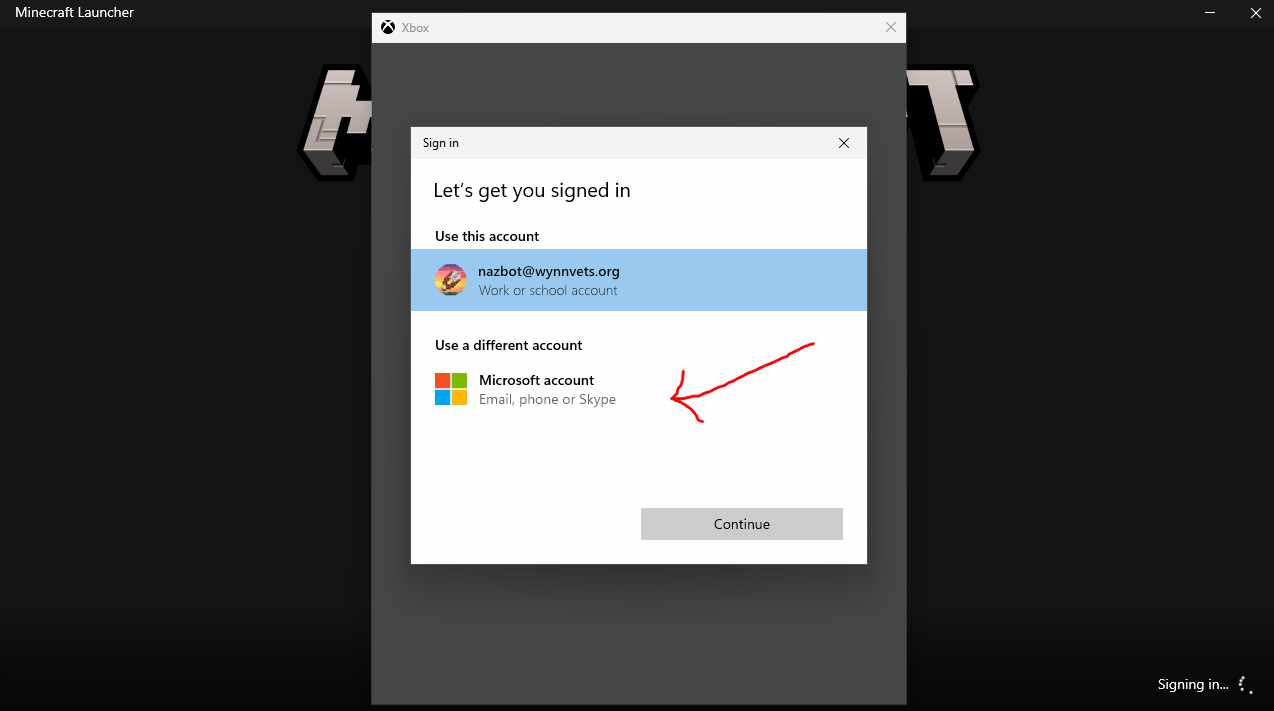
If you see the text indicated with the blue arrow
Unfortunately, Microsoft requires your computer to be configured with a MS account.
We will be doing that in the next step!
If you do not see the red text, you’re all set!
Agree to the terms (red arrow), install (green arrow), and skip the next step!
Attaching a Microsoft Account to Windows
Microsoft only lets their official launcher active on computers with an added MS Account1.
If you ended the previous step with red “Before installing this version …” error text, you will need to do this step.
If not, you are free to skip this step!
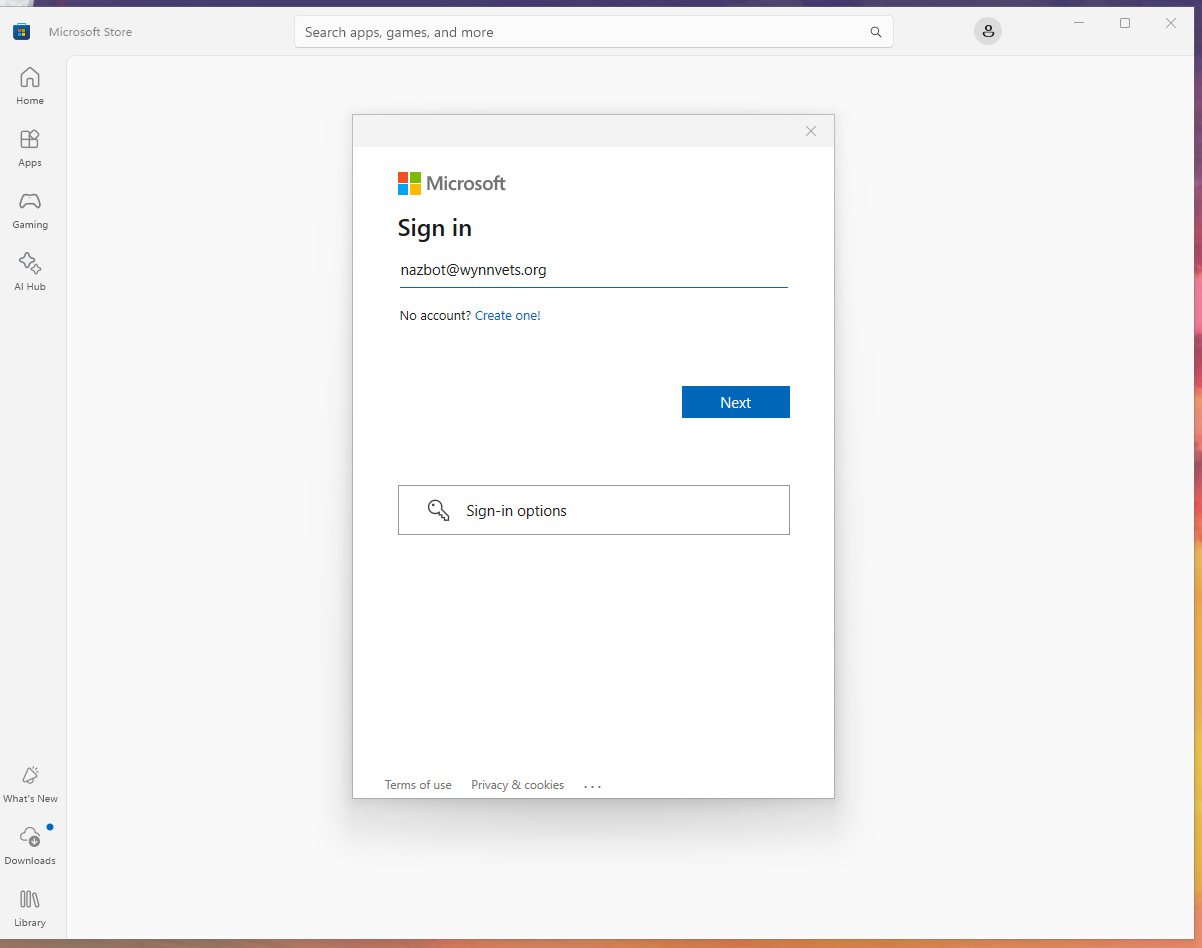
Opening the Microsoft Store (available through your start menu) will ask for a MS account.
This can be any account and does not need to match your minecraft account.
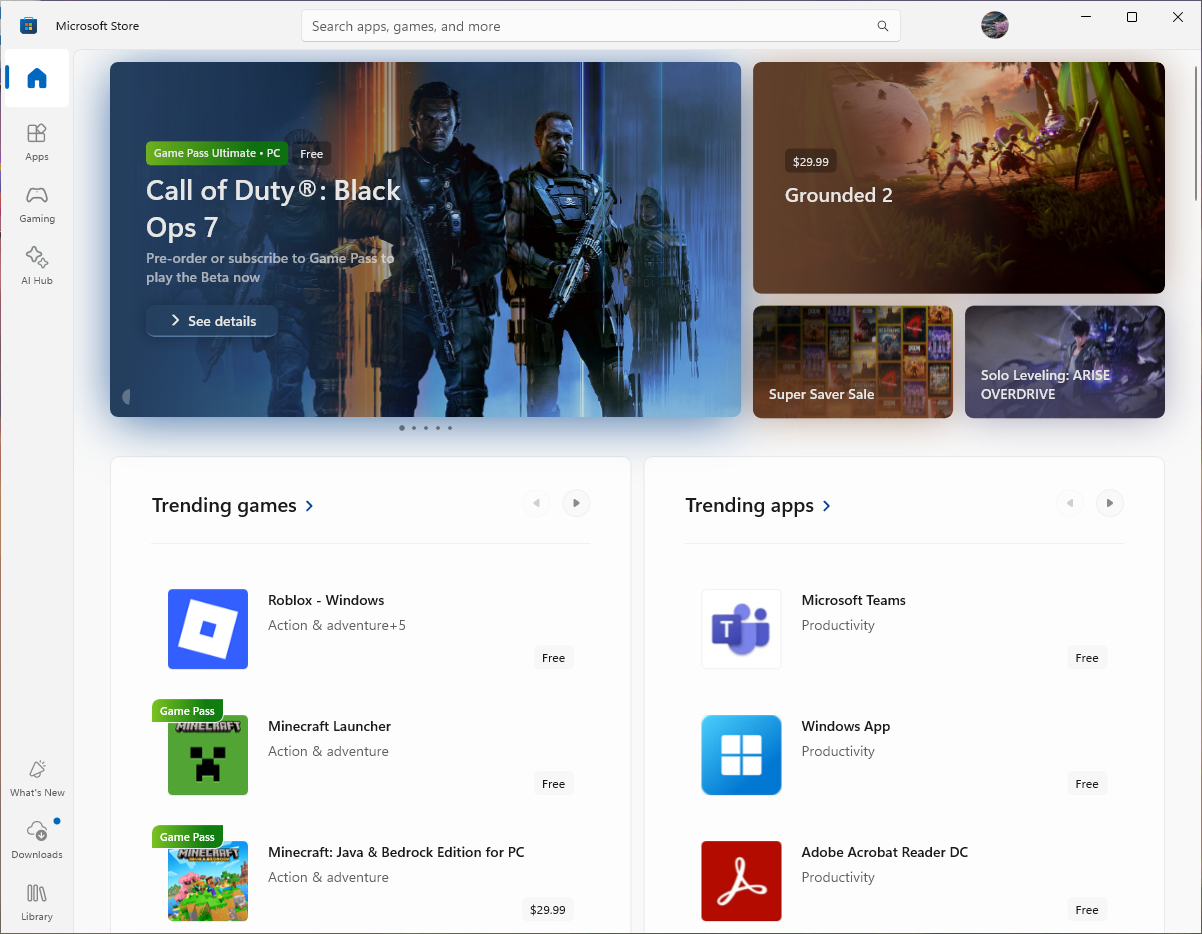
Once you are done with that, close the windows store, re-open the minecraft launcher, and click launch.
Installing Minecraft
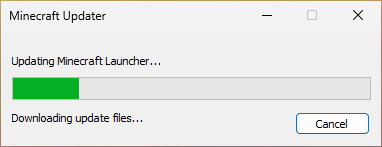
Now that you’ve managed to click the “Install” button on the launcher, it’s mostly just a matter of waiting! Note that you will probably be asked to provide user account control during this step.
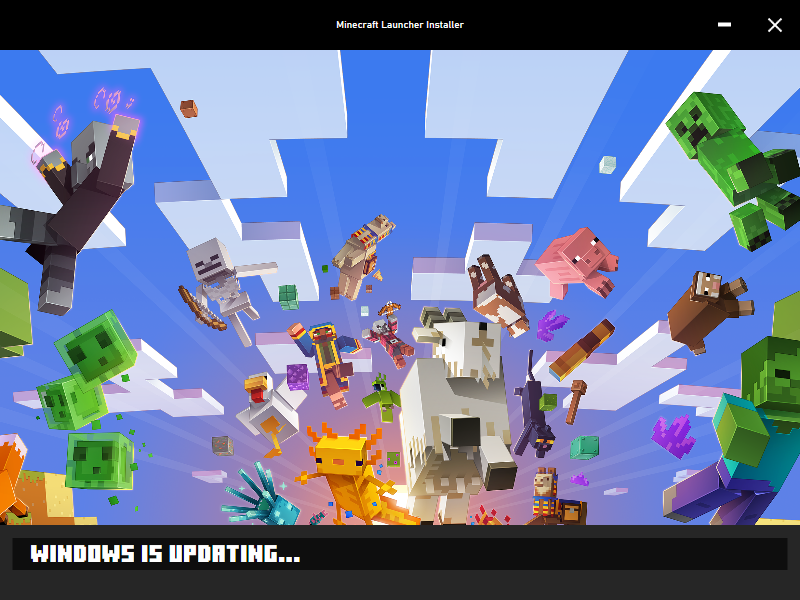
Chances are the launcher will install a bunch of runtime environments and whatnot.
This can take a while.
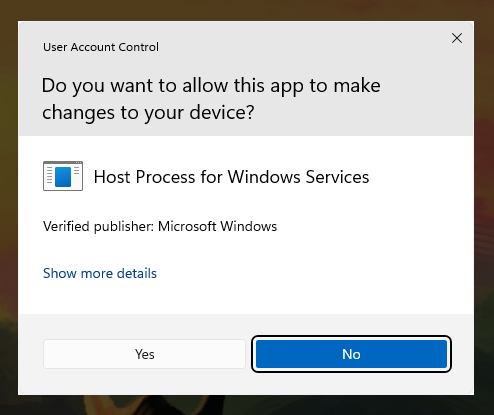
At some point, the launcher will probably give you a user account control dialog.
This is safe to accept.
Authenticating Minecraft
So… we’ve installed Minecraft, but that isn’t enough for Microsoft. Time for more authentication! After you click “Let’s Go”, it will ask you to sign in a few times before it actually launches.
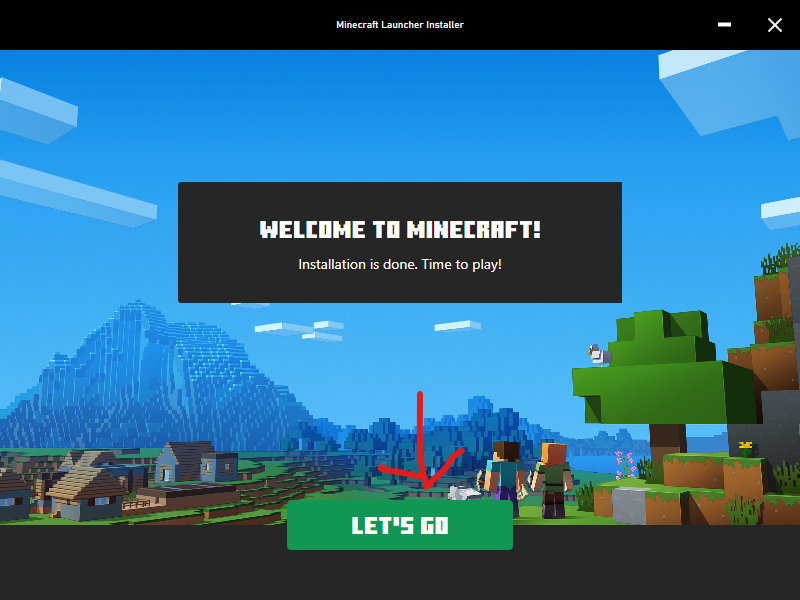
First things first, we need to click the “Let’s Go” button!
At some point, the launcher will probably ask you to sign in to an xbox account.2
This does not need to be the MS account associated with your Minecraft account.
At this point, the launcher will probably spend a few mins downloading more assets.
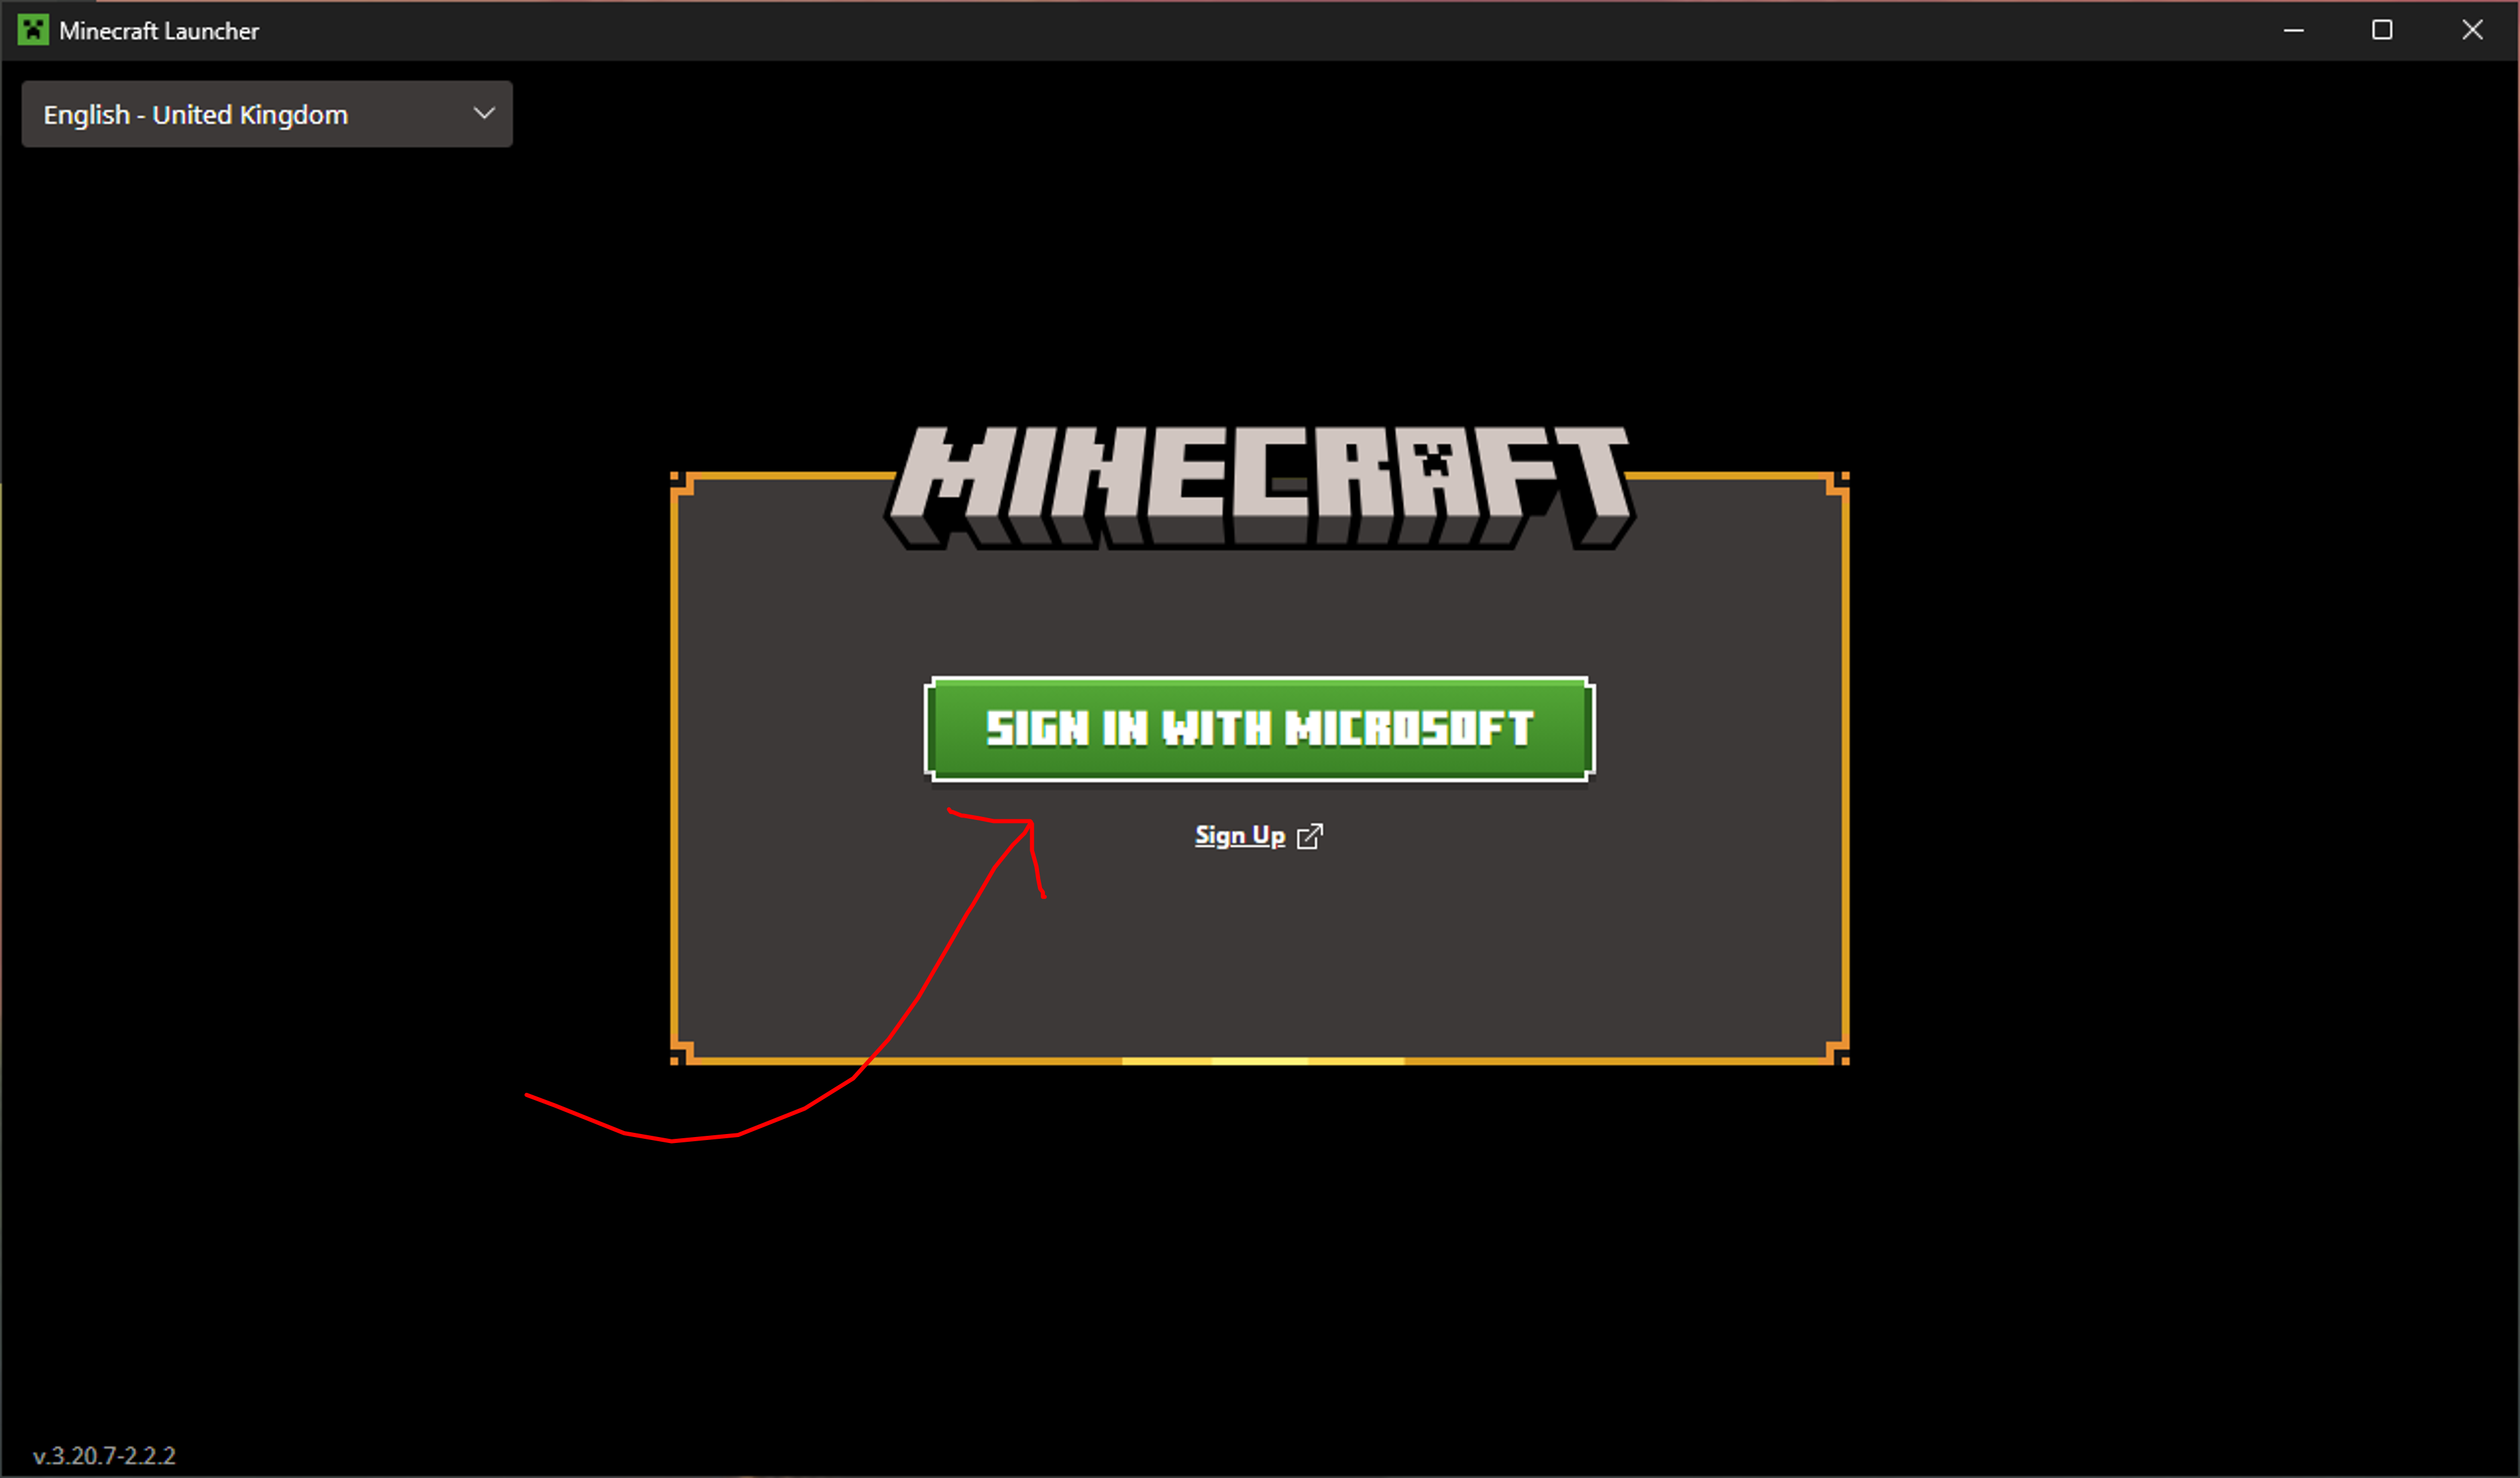
Finally, you will be asked to sign in one last time.
This time, it is the account you will be playing on (i.e. your minecraft account)!
You’re Done!
The Minecraft launcher has now been installed… too bad we won’t be using it! The last step for this part is to close your launcher and start with the launchy instructions below.
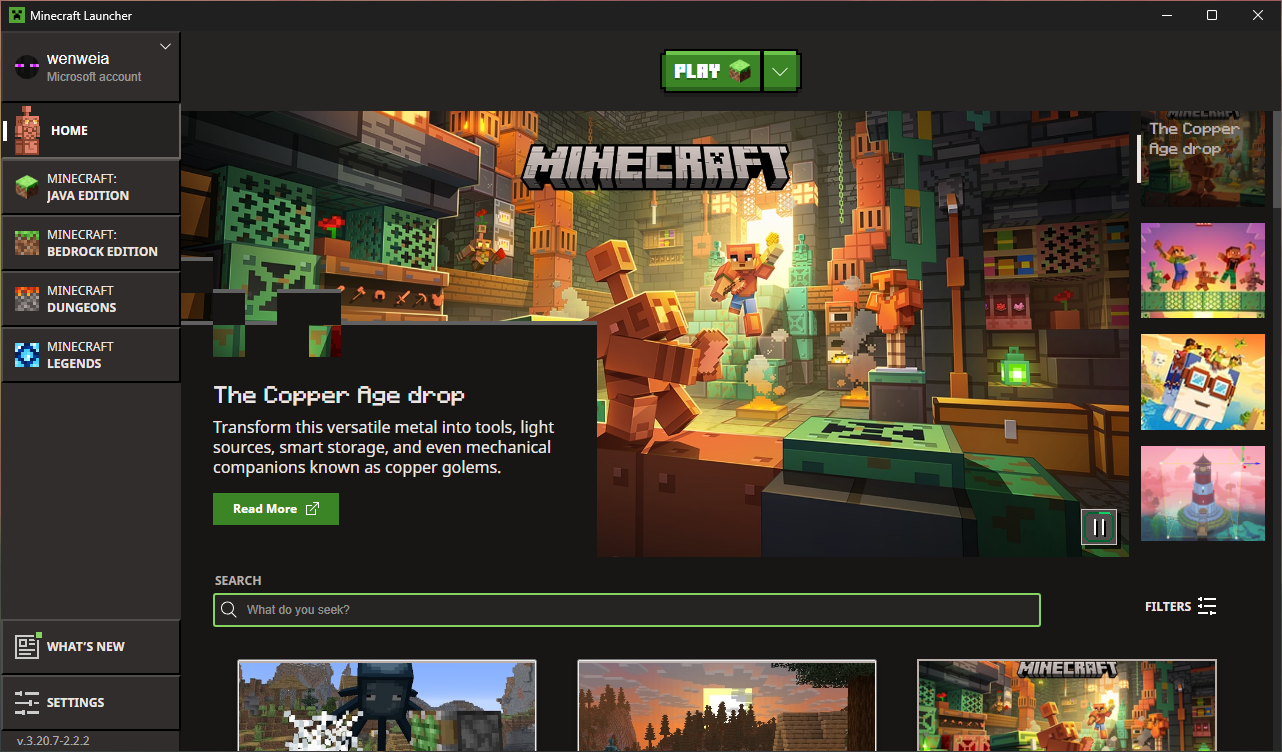
When you see this screen, you are done!
Close this window and move on to Launchy
Downloading Launchy
Now that we have Minecraft, it’s time to modify it for Wynn. Compared to setting up Minecraft itself, this part is much easier!
For instructions on how to install launchy, expand this!
Fetching Launchy
First, we need to download and run the Launchy installer.
Because launchy is Wynn-specific, it isn’t used by that many people.
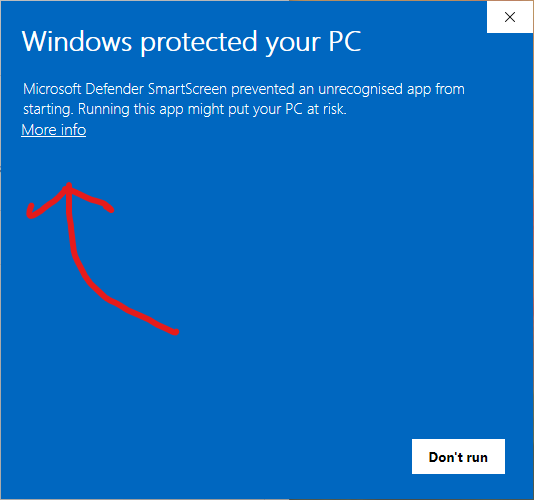
Your OS will probably complain about this fact. This is normal.
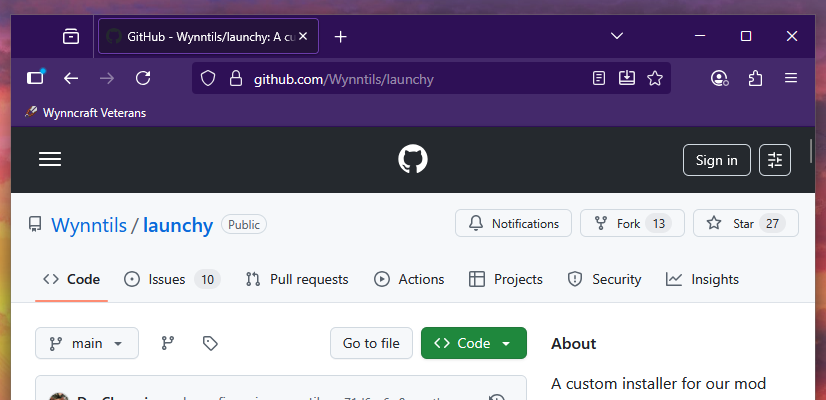
First things first, we need to visit Launchy’s web page
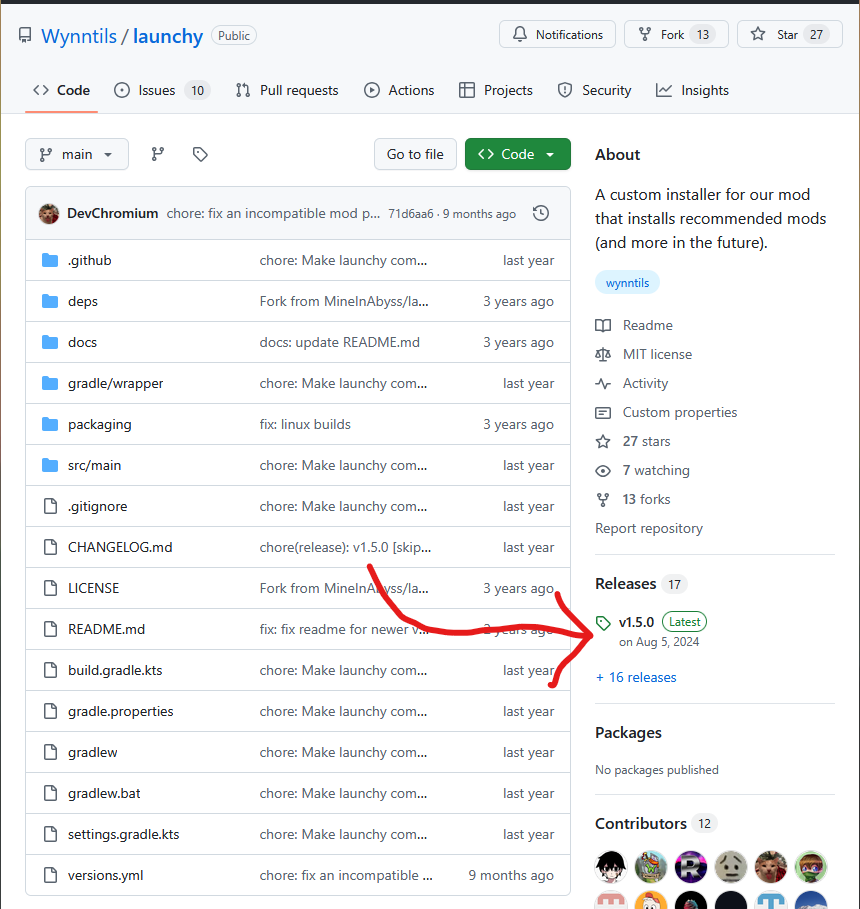
From there, we will need to click the latest release.
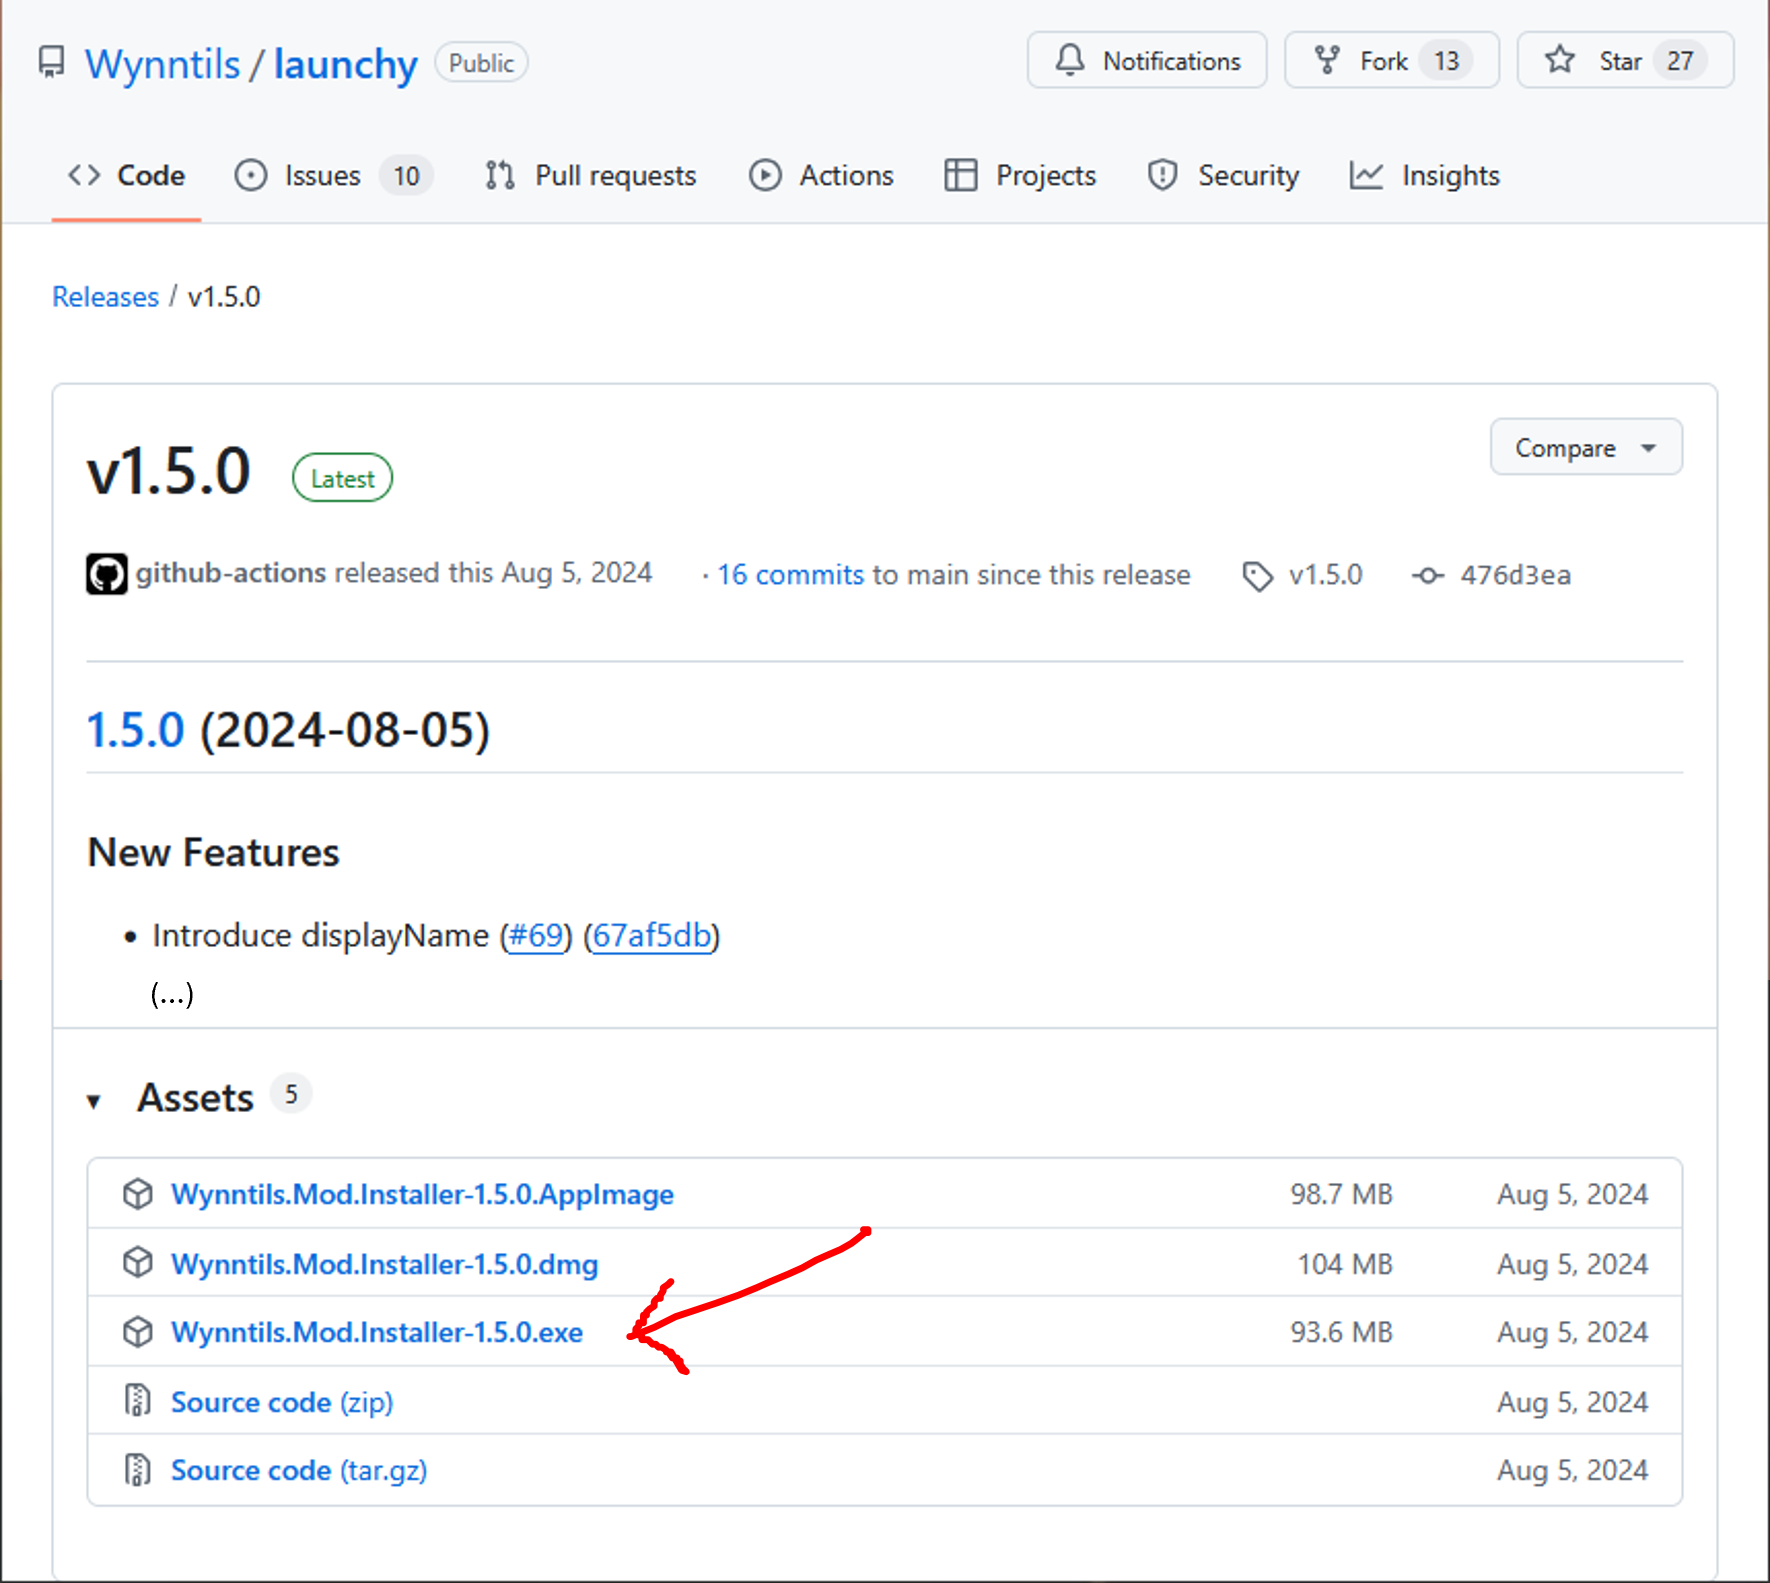
There will be several files within the latest release.
We want to choose our installer.
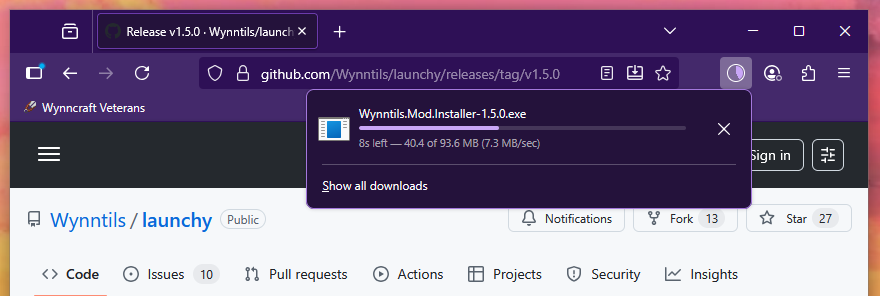
Then we just need to wait for it to download and run the file.
One problem with Launchy is that there aren’t that many people who use it.
Its frequent releases compound this problem. We trust launchy on account of its open source and the significant overlaps between Wynn’s dev team and Wynntils’.
But although we do, your operating system probably won’t.
If you get this alert, you will need to click “More Info”.
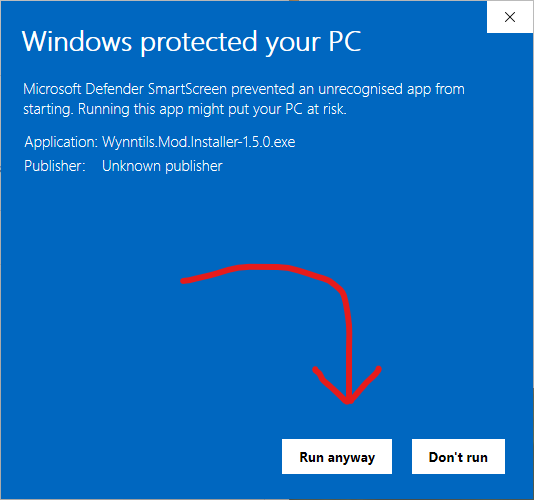
Click “Run Anyways”
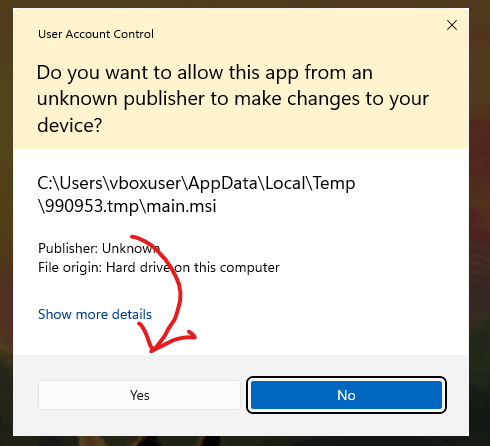
Around this point, you will probably get prompted with windows User Account Control.
This is safe to accept.
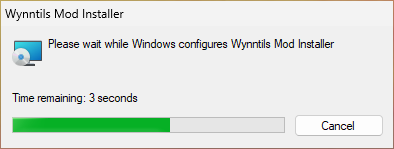
You’re done! Launchy will now install the needed files and put a shortcut on your desktop.
Configuring Launchy
Now that we have the wrapper installed, it’s time to set up our Wynncraft instance! Compared to the last steps, this part is fairly straight forward!
Click the Launchy icon on your desktop and follow its instructions, closing it when you are done!
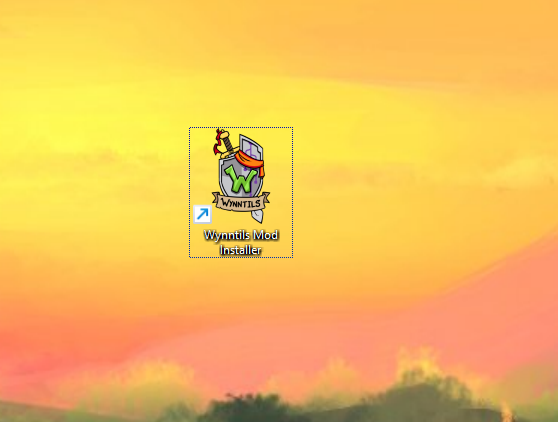
At the end of the previous step, a shortcut will have appeared on your desktop: now is the time to click it!
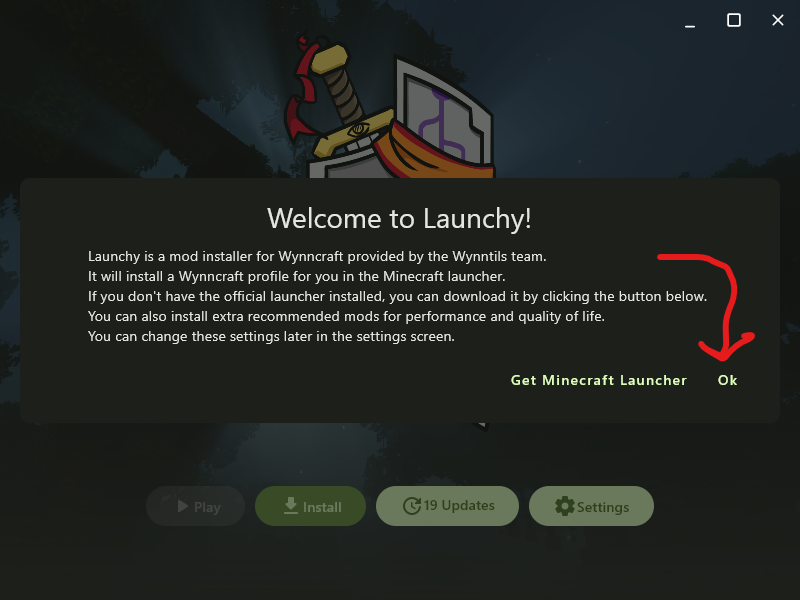
You will be greeted you with a welcome screen reminder stating that, as a wrapper, Launchy only works if you already have the official launcher installed.
We’ve already done that! Feel free to click “ok”
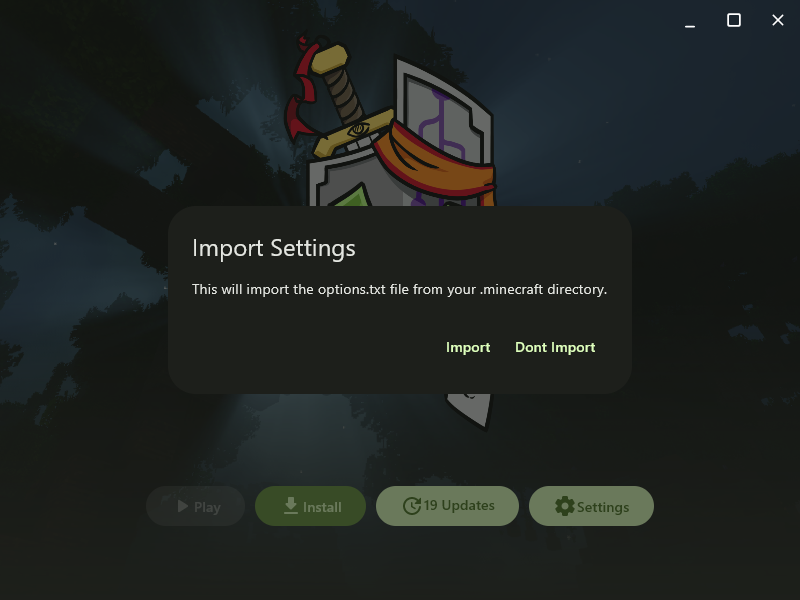
You will be asked if you want to import any settings form the launcher you just installed
If you just installed the MC launcher via the earlier steps of this guide, importing won’t do much. Otherwise, it is probably worthwhile.
When you are done importing, click the Install button!
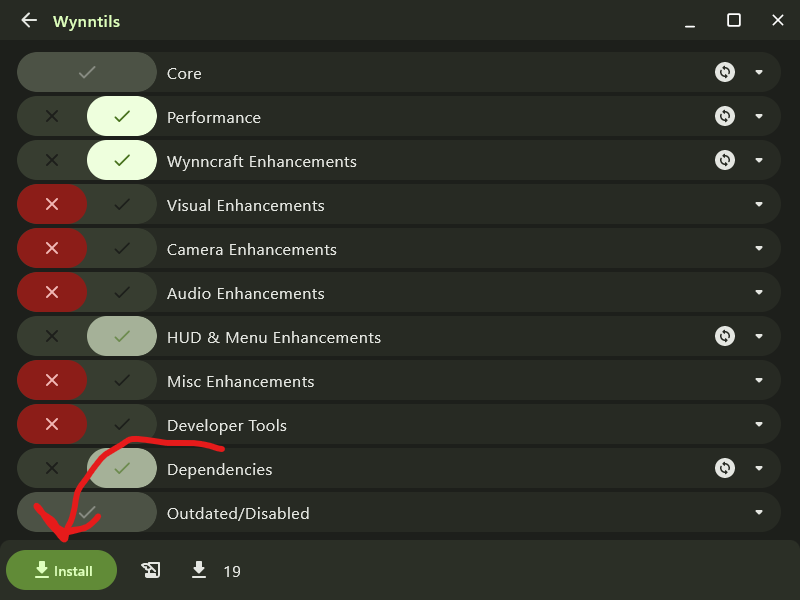
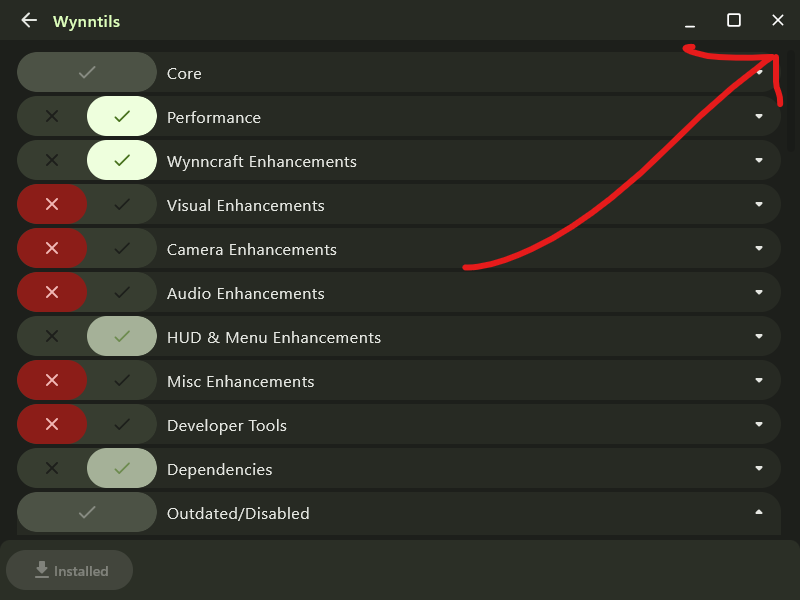
Launchy will give you a menu offering several different categories of mods chosen by the Wynntils team. These are just general mods that are popular within the community and that work well with wynntils.
Select the mod categories you would like to use.
Then click the install button in the bottom left
And just like that, you are done! A new Wynncraft-related profile has been added to your instance of the official launcher!
Close Launchy.
Launching Wynncraft
In the previous steps, we used a wrapper to make a new Wynncraft instance in the Vanilla launcher. It’s time to play that instance!
Simply open your vanilla launcher and open your new “Wynncraft” instance!
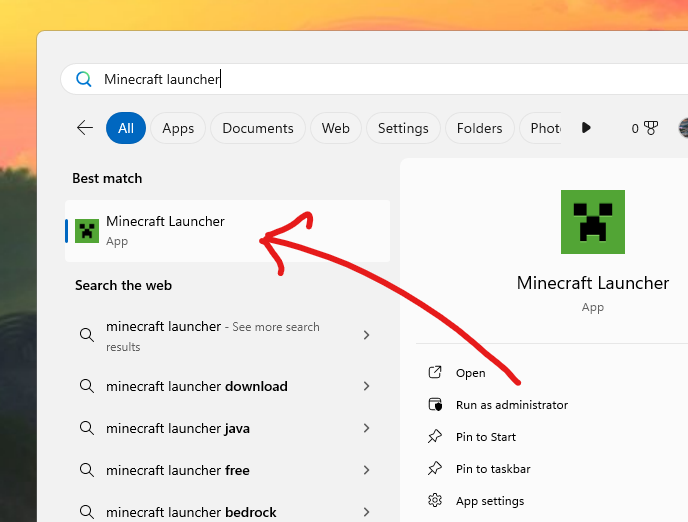
Open the official Minecraft launcher!
On windows, this can probably be found via your start menu!

Click on the Java Edition tab!
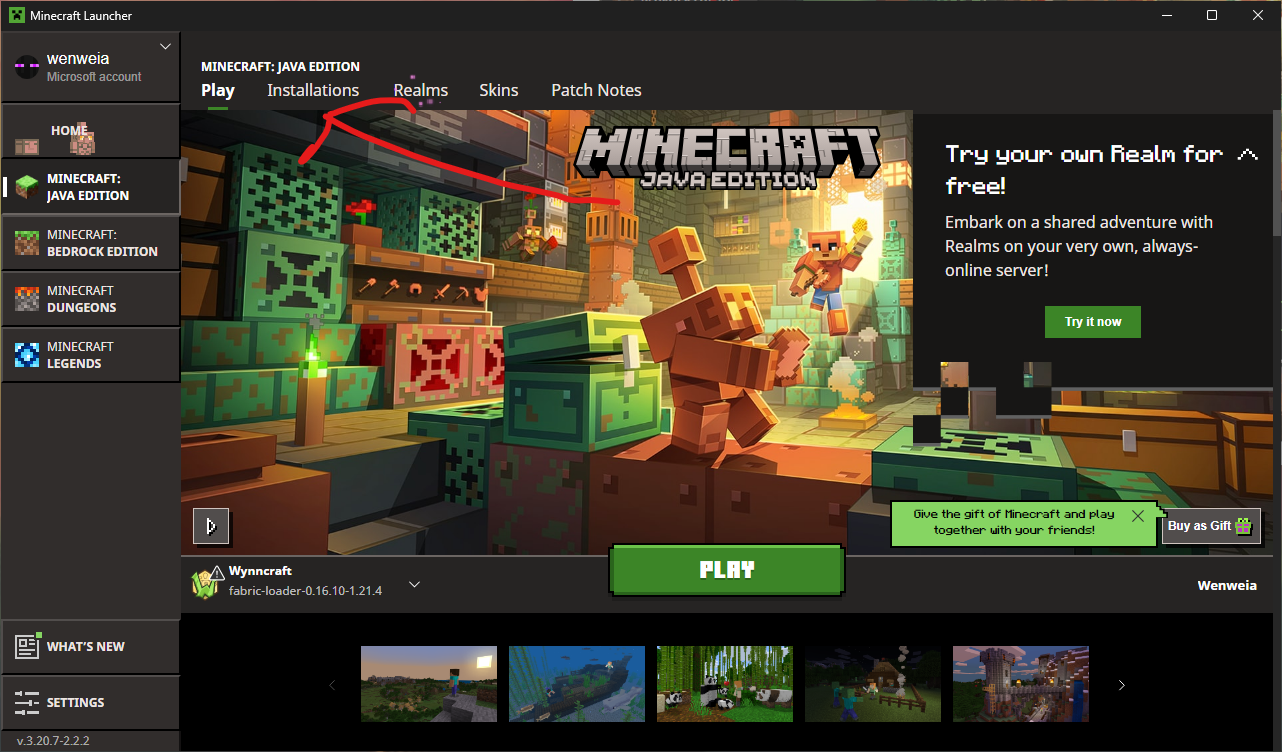
Under the Java Edition tab, click on the installations sub-tab!
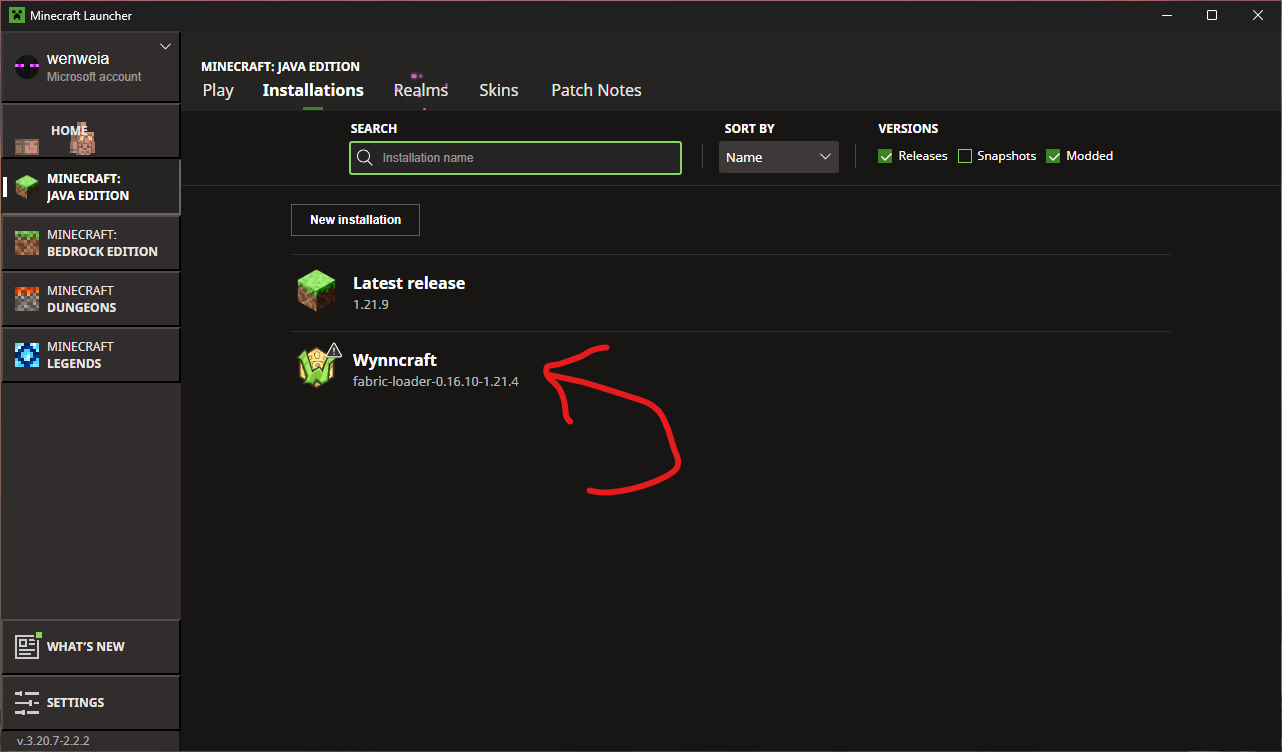
Find the new Wynncraft instance and click on it!
It should have a Wynn logo
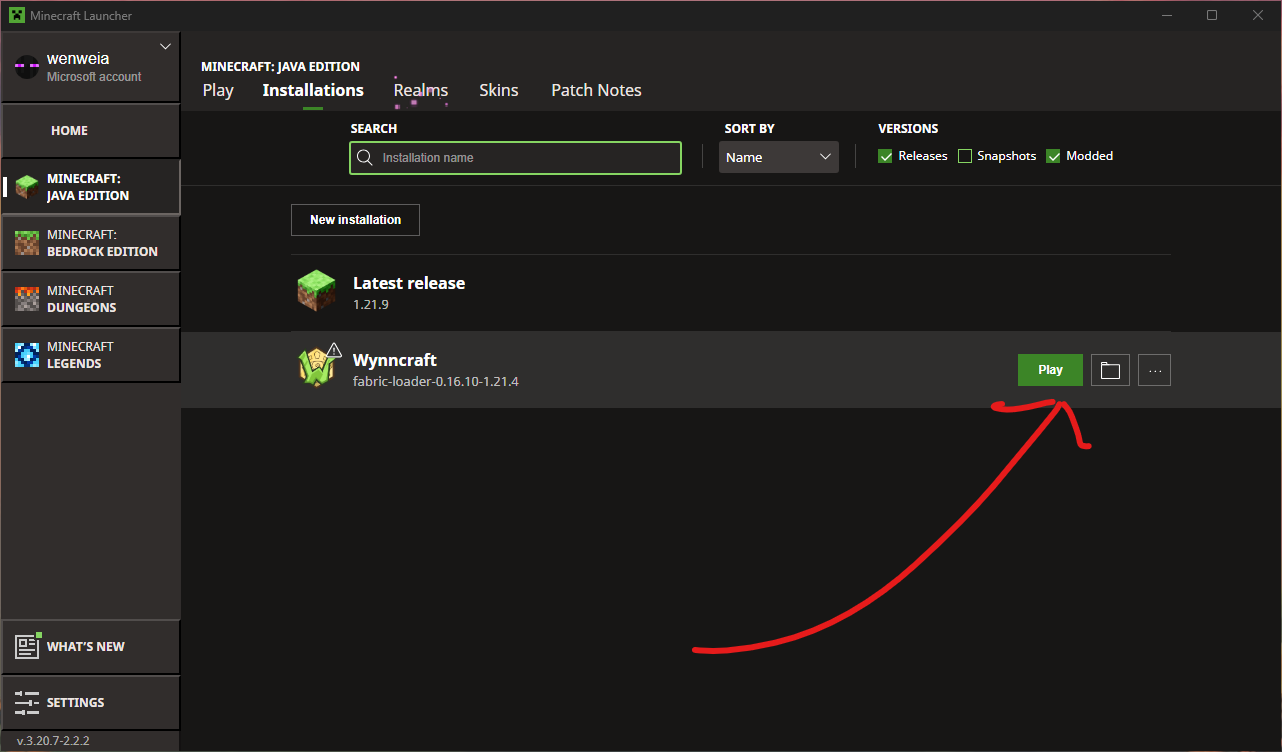
Hovering over the wynn instance, find and click the green play button!
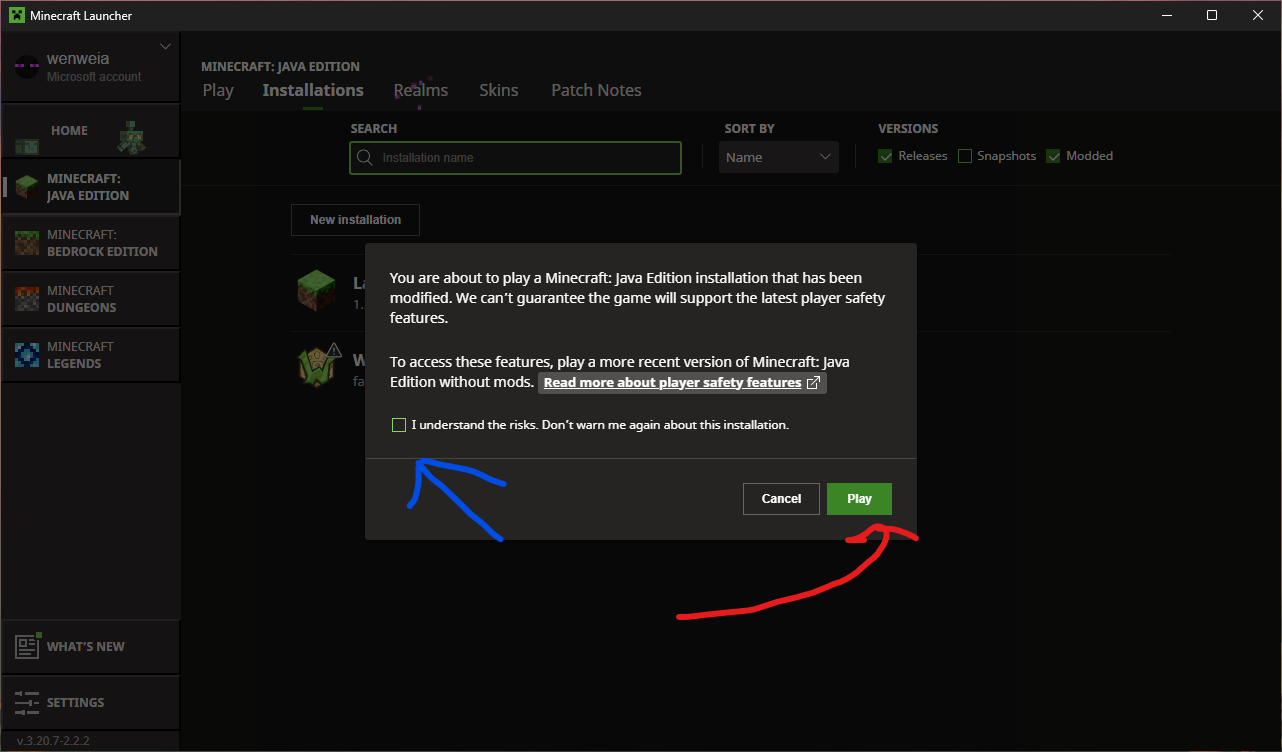
Mojang will prevent you a nag message reminding you that this client is modified.
Acknowledge the disclaimer and click play!
You’re done!
The Most Performant Approach
Is your computer a potato? Are you willing to spend a few extra moments to mash as much performance out of your potato as possible? You’ve come to the right place!
This tutorial will walk through how to make a bare-bones wynntils installation with a boatload of performance enhancements/optimisations… and not a whole lot else.
Expand this for instructions on how to build a performance-focused bare-bones wynntils instance!
Installing Prism
For this tutorial, we will be using PrismMC’s launcher.
Prism is an alternative to Mojang’s vanilla launcher developed by the community as a means to make it easier for users to create and modify independently customisable clients of Minecraft. It provides easy integration between most loaders (forge, fabric, etc.) and repositories (curseforge, modrinth, etc.) to simplify launching, monitoring, and using separate instances of the game.
First things first, we need to fetch the Prism installer from this page!
If you would like more details on installing your prism client, expand this section!
Fetching Prism

The first thing we will need is the Prism Launcher’s exe!
This can be found from this page of the PrismMC Website!
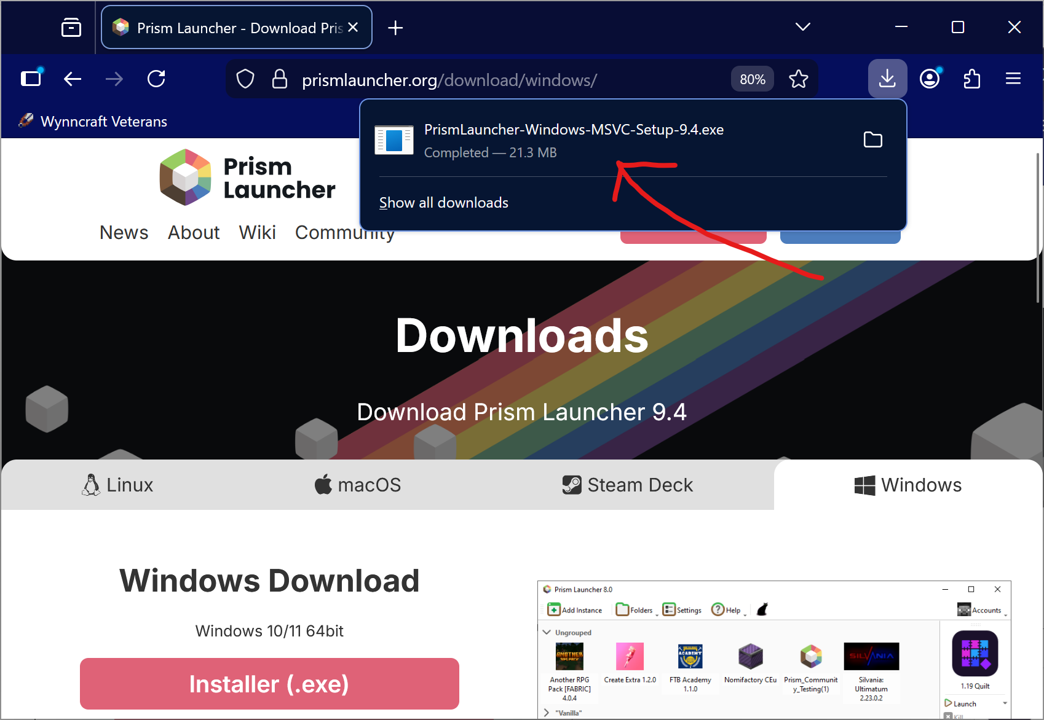
Then we just need to download the file and run it!
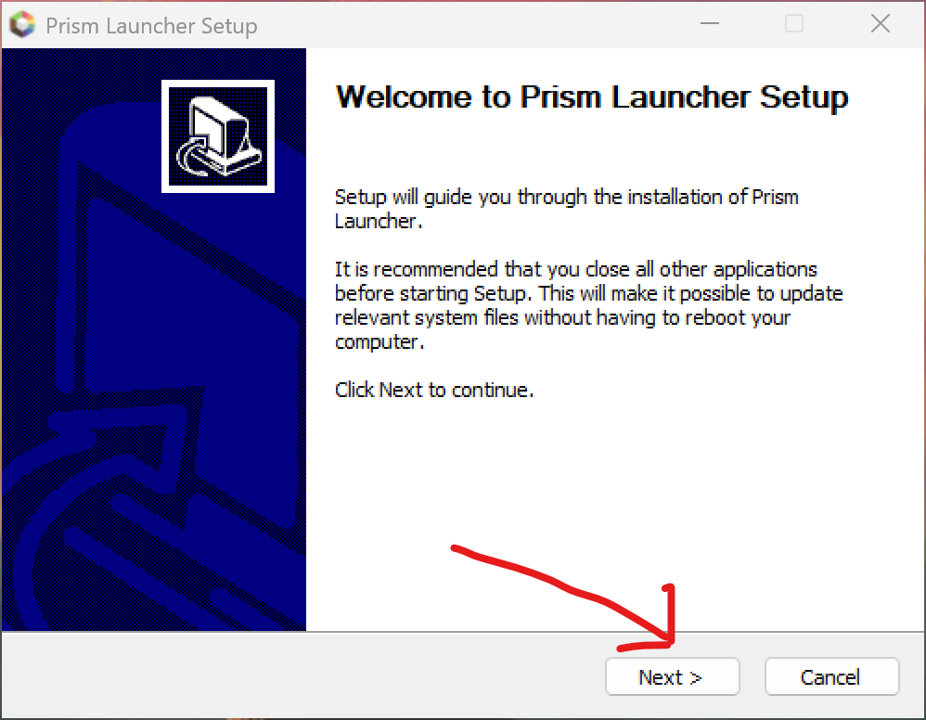
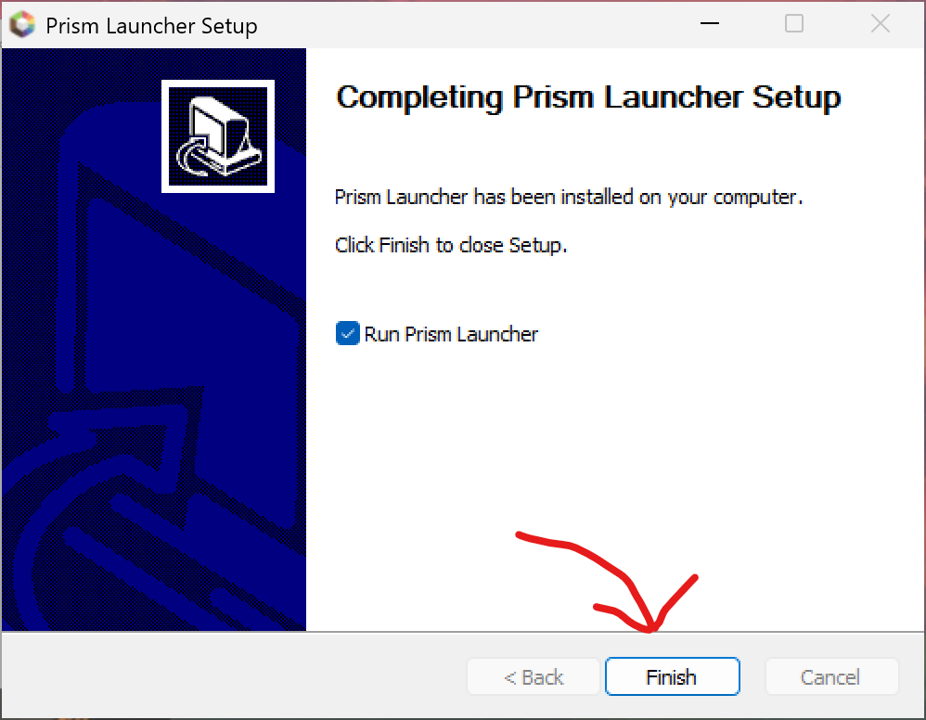
Follow through the prompts on the installer.
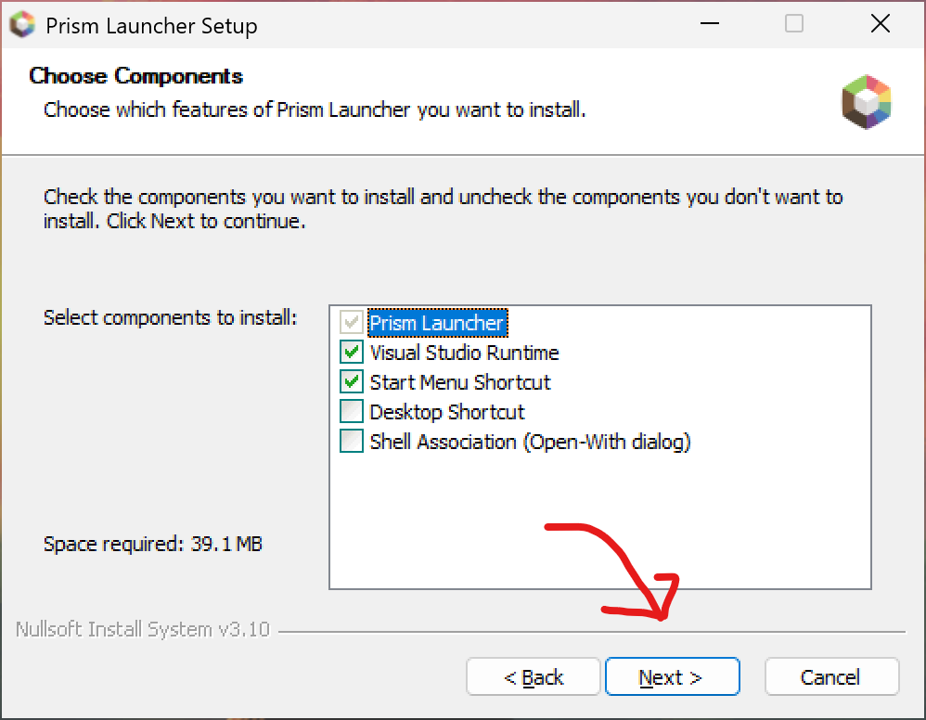
Note that the visual studio runtime makes Prism a lot more useful!
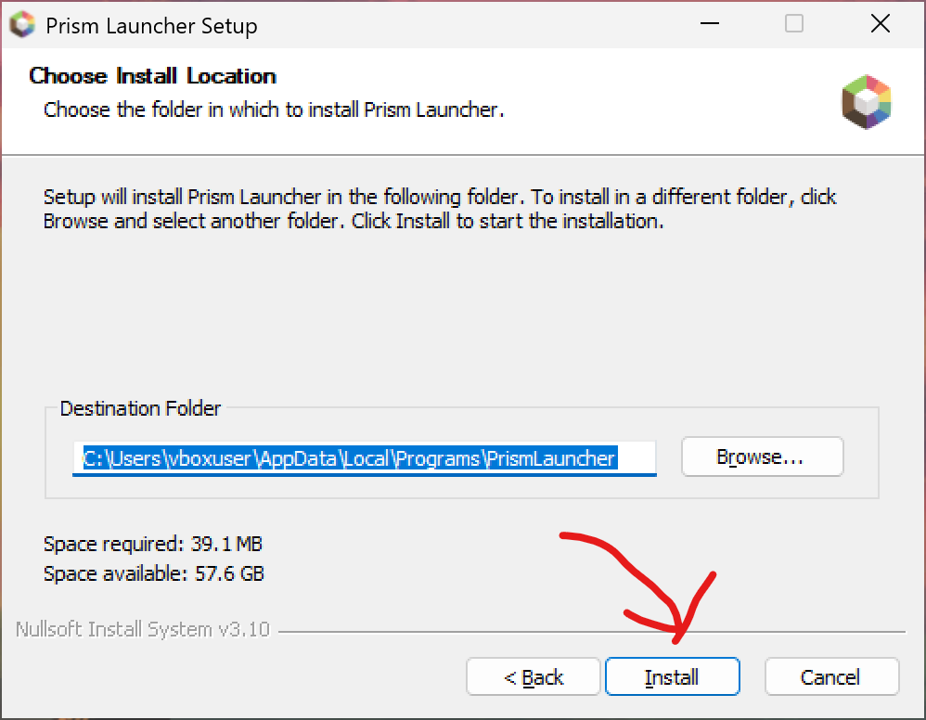
Note that the location chosen on this step is just where the launcher’s files are stored, not where the instances end up.
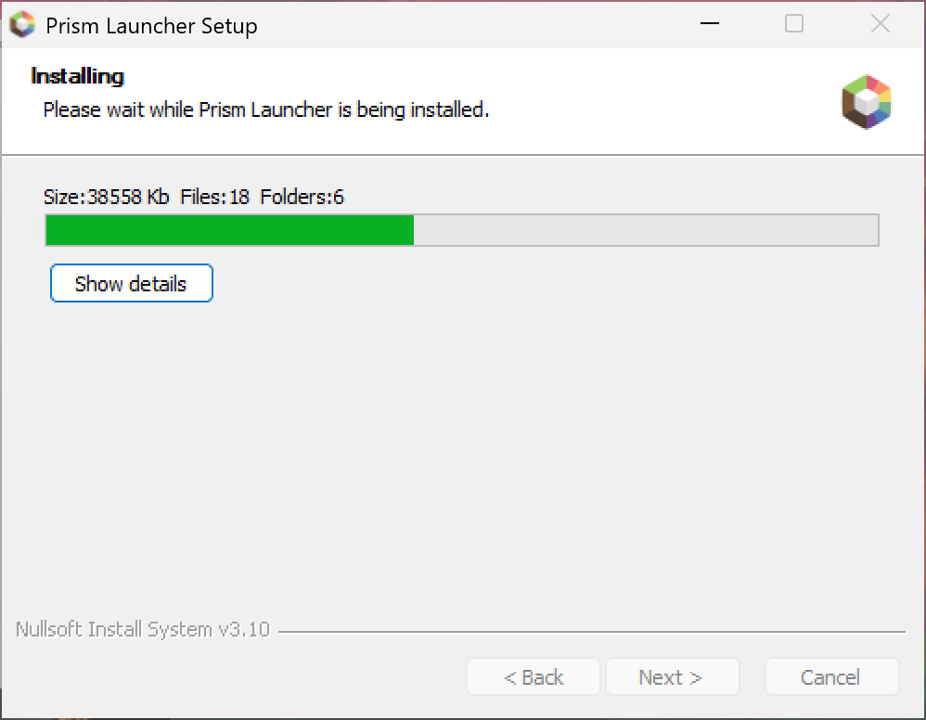
This may take quite a while to install.
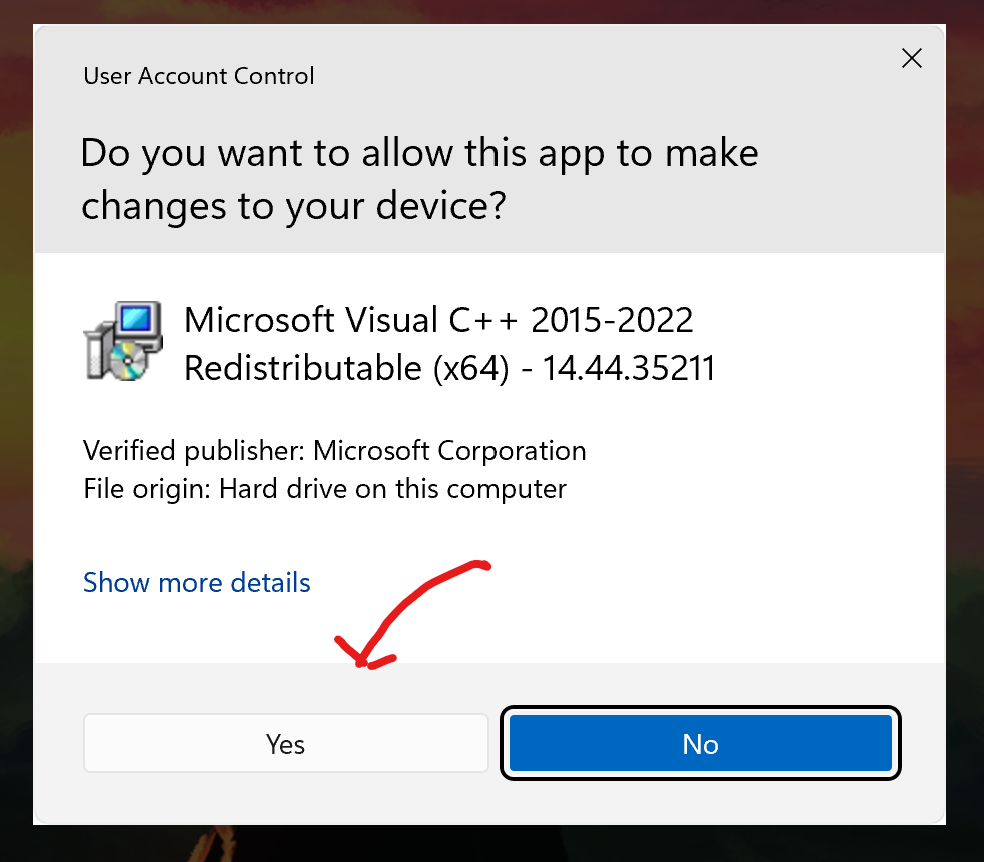
You will also likely be asked for user account control permission a few times. Don’t worry, this is normal.
You will also likely be asked for user account control permission a few times. Don’t worry, this is normal.
Configuring Prism
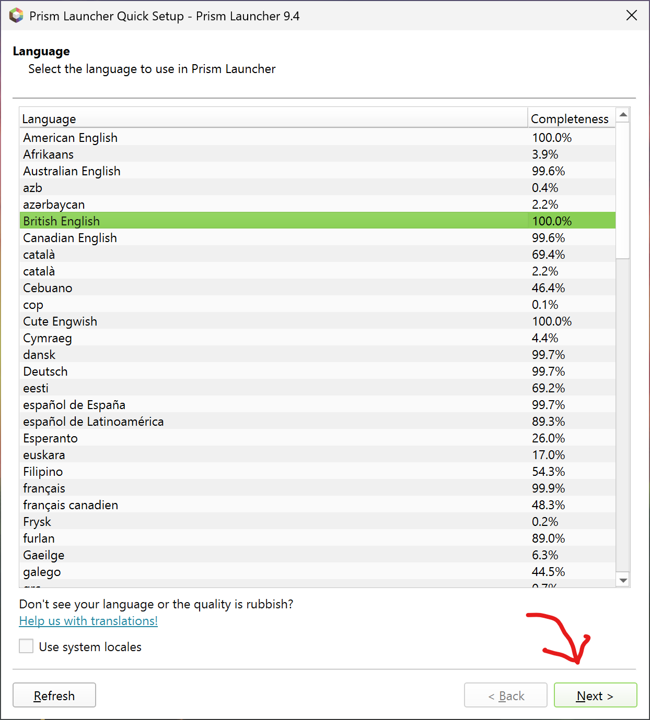
Opening prism for the first time, you will be prompted for a few things. The first is your language (just the interface for prism itself, not your minecraft client).
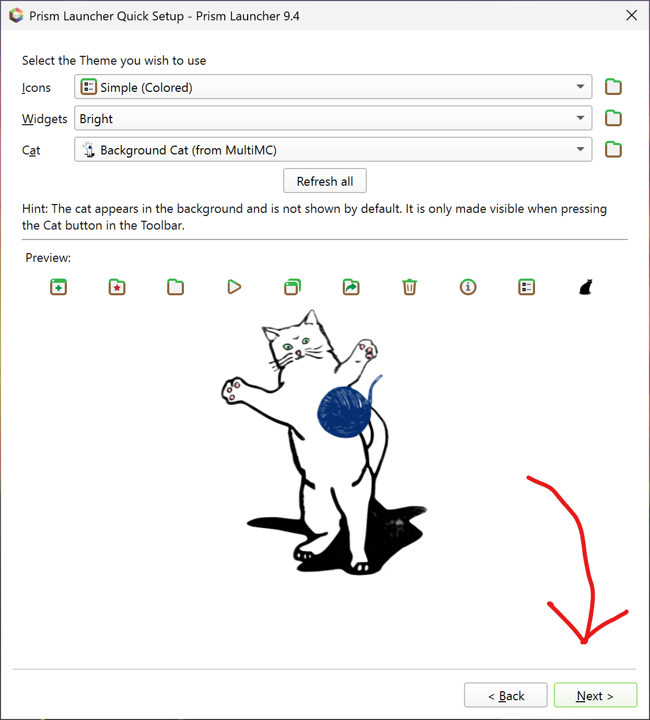
You are also given a chance to choose your cat! (And some other visual tweaks).
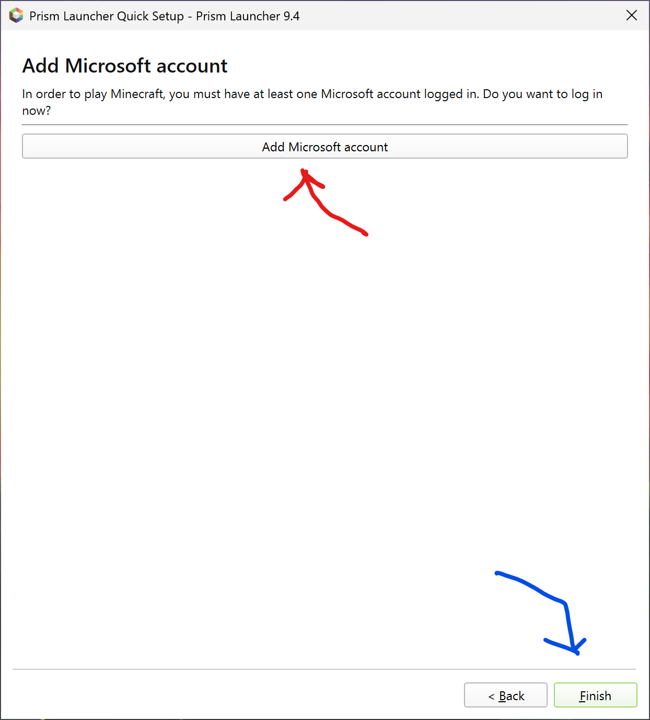
This step is important! The minecraft account(s) you log in with are the ones you will be able to launch clients for!
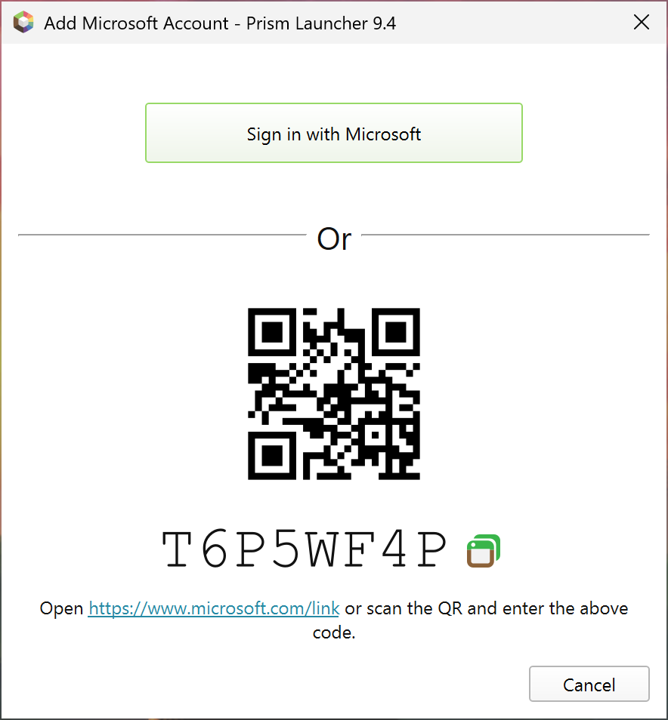
Prism offers several ways to authenticate with your microsoft account. The easiest is probably the “sign in with microsoft” button, which opens ms’ account login website
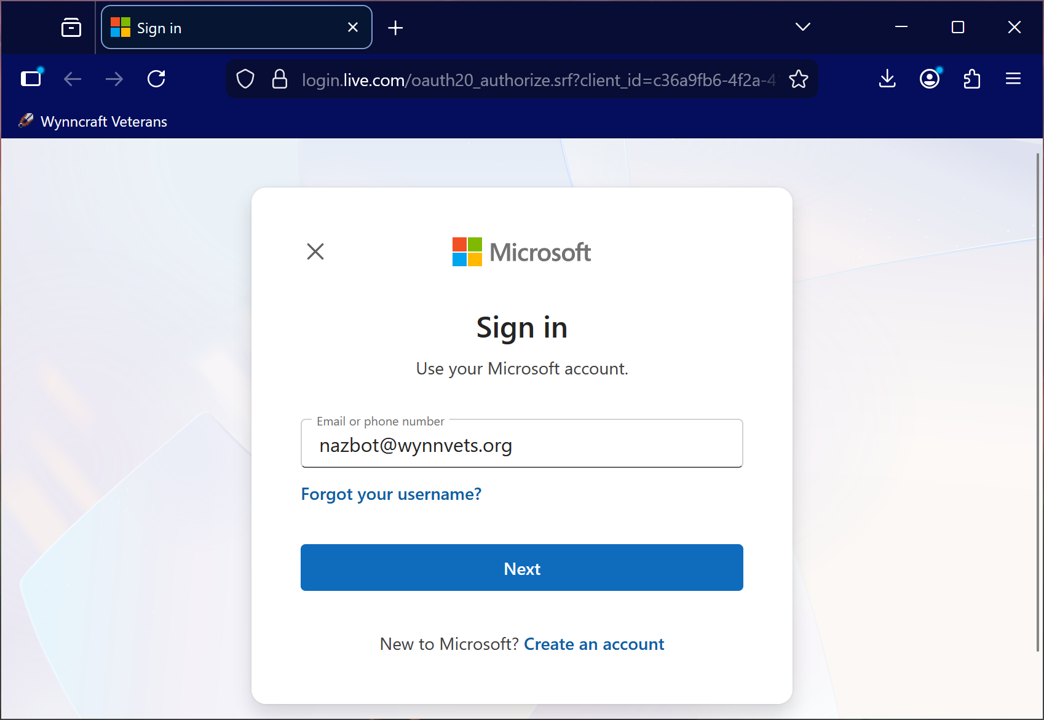
This is just a standard microsoft login. Login with the same account your Minecraft account was created/migrated with.
You’re done!
Creating Your Instance
We’re ready to create the foundation for your Wynn instance! The first step is to create your instance.
We will be using the Adrenaline modpack as the basis for this install, centred on the version Wynncraft is currently running

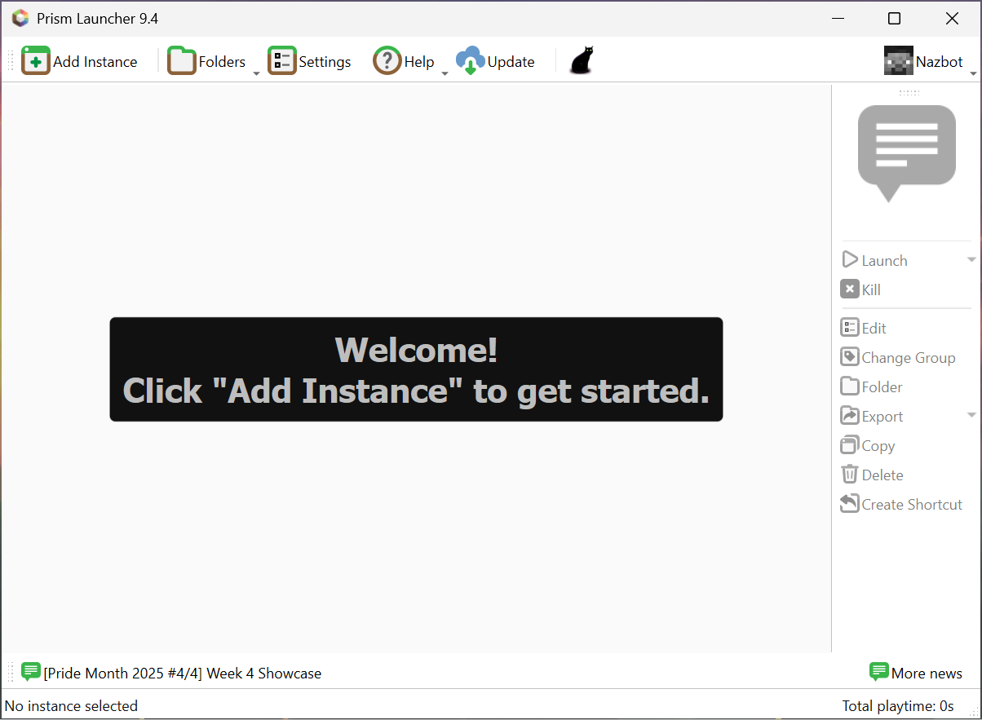
To get started, open prism and click ‘add instance’ (top left).
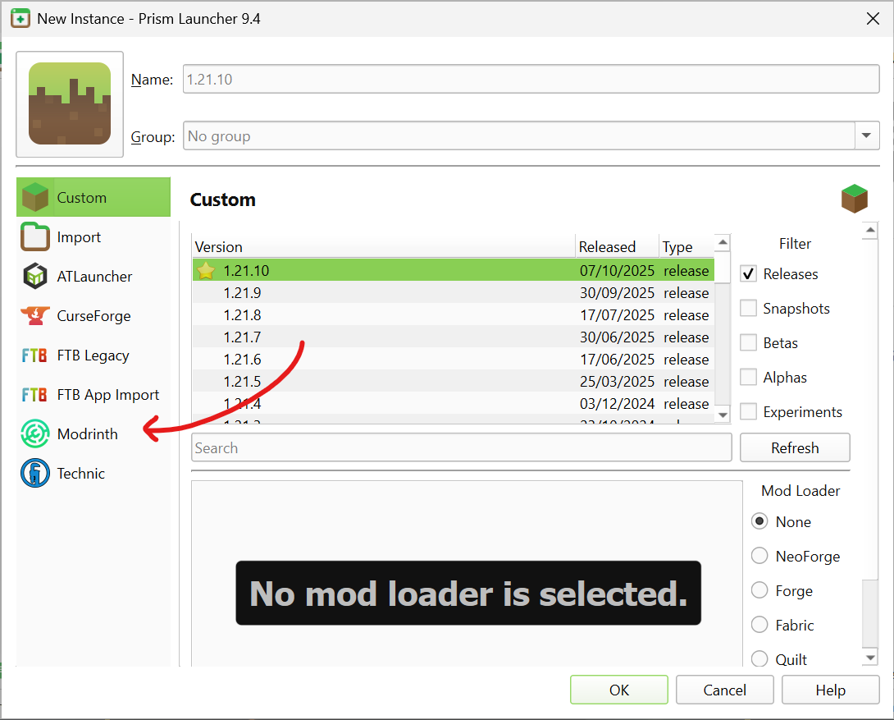
Ignoring the default page, go directly to the Modrinth tab of your new instance.

Search the modrinth page for the ‘Adrenaline’ modpack, click it, navigate to the bottom right, and click the version slider
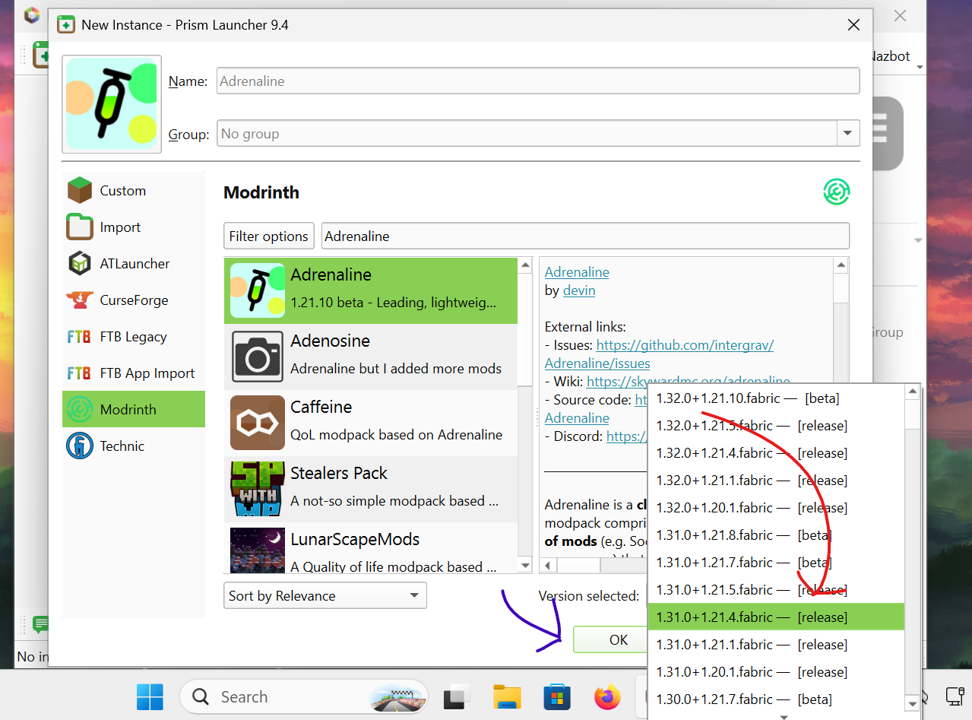
Select whatever version Wynncraft happens to be running right now, and click the ‘ok’ buton.
Modding your instance
We’re ready to install Wynn mods! For the reasons outlined in the general notes section, although Wynn modpacks exist, it is generally preferable to install mods yourself.
In this case, since we are assuming your computer is a potato, the only mod we will be installing is Wynntils.

After giving it a few moments to install, right click on your newely created instance and click ‘edit’.
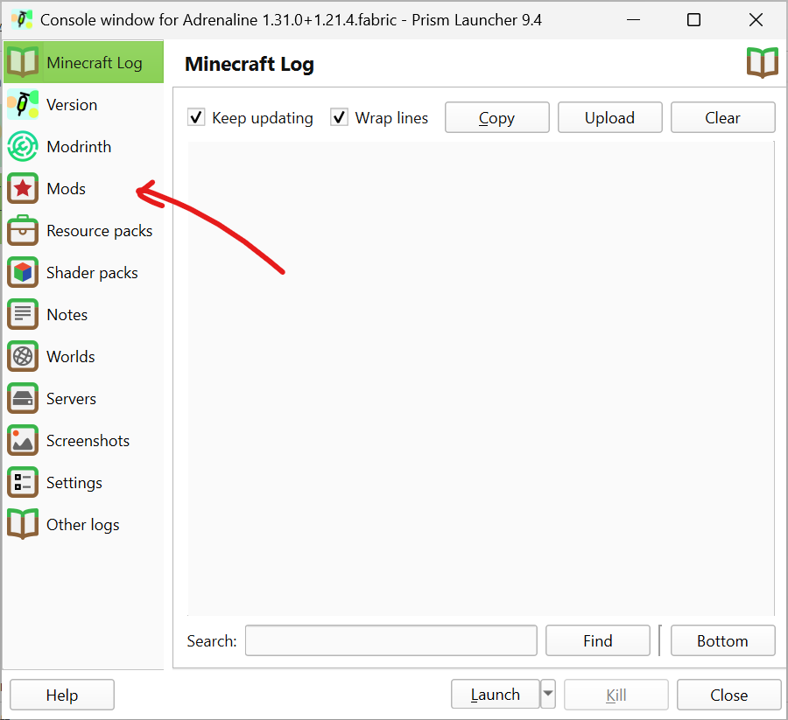
In your instance’s edit menu, click on the ‘Mods’ tab.
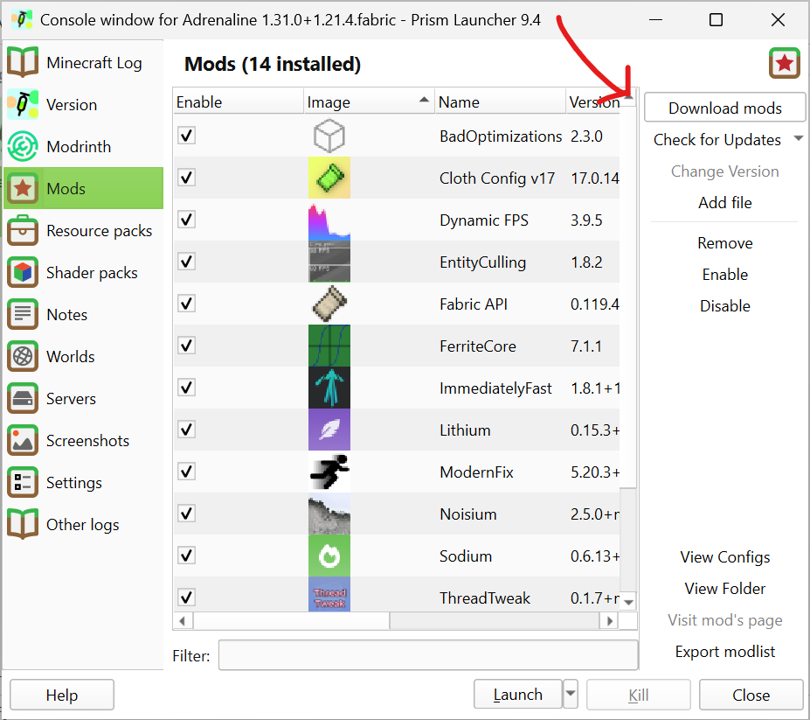
From within the modding tab, click ‘download mods’ button.
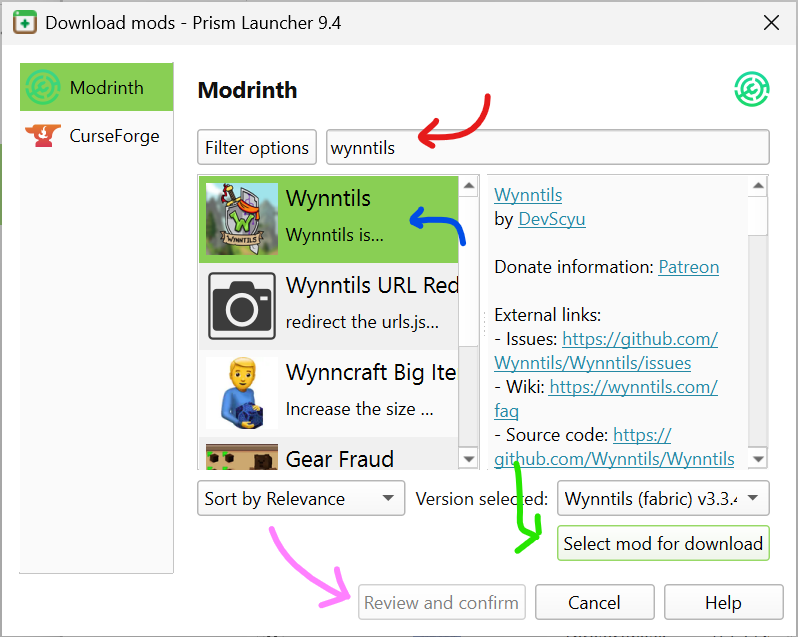
(red) Search for Wynntils, (blue) click it, (green) select it for download, and (pink) review and confirm.
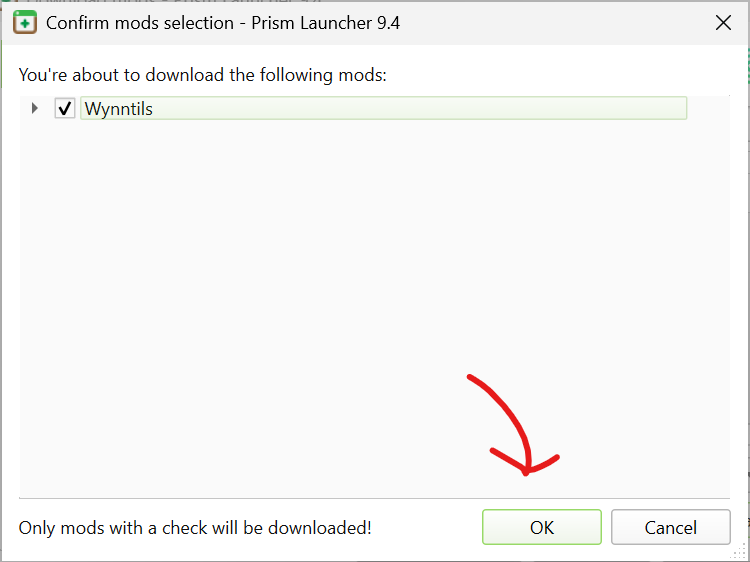
Having selected review and confirm in the previous step, you should now be presented with this screen. Click ‘ok’, and you are done!
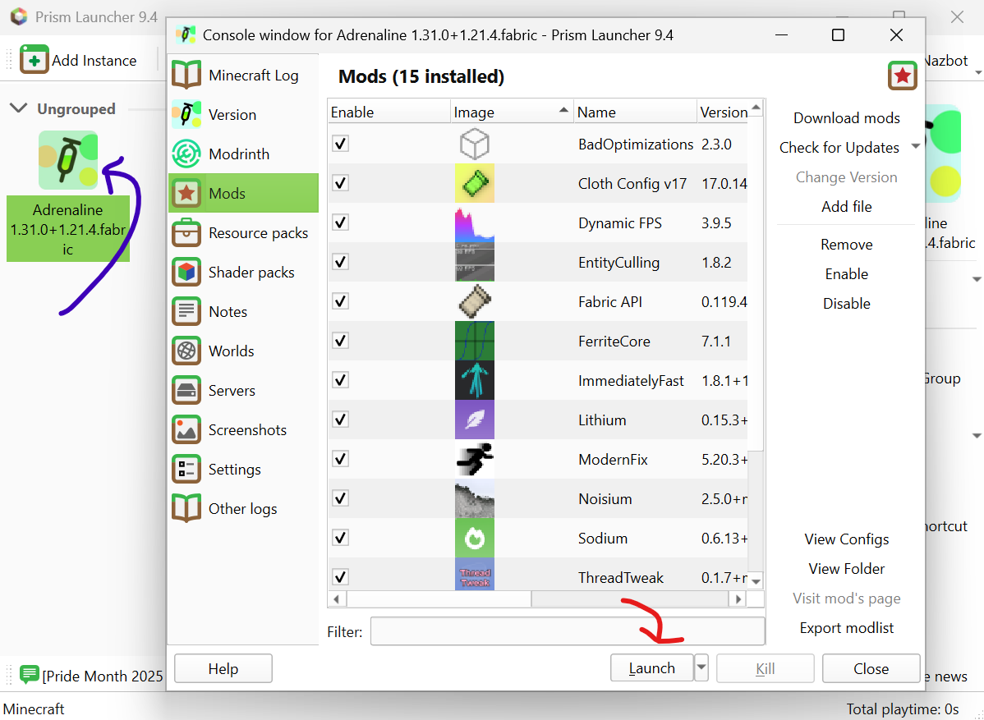
You’re done! You can click Launch (red) now; in future, you can also double click the client icon (blue) from your prism launcher to do the same thing!
The Maximum Quality Approach
Is your computer somewhat functional? Are you willing to spend a few extra moments to tweak Wynn to work exactly how you want it? Are you jealous of the cool mods other people are using? You’ve come to the right place!
This tutorial will give you the foundations needed to install basically any wynn mods imaginable. It will also point out a lot of the more popular ones and some important notes with respect to how you can set them up (dependencies galore)!
Expand this for a foundation primer on how to create a wynn install tailored to you!
Installing Prism
For this tutorial, we will be using PrismMC’s launcher.
Prism is an alternative to Mojang’s vanilla launcher developed by the community as a means to make it easier for users to create and modify independently customisable clients of Minecraft. It provides easy integration between most loaders (forge, fabric, etc.) and repositories (curseforge, modrinth, etc.) to simplify launching, monitoring, and using separate instances of the game.
First things first, we need to fetch the Prism installer from this page!
If you would like more details on installing your prism client, expand this section!
Fetching Prism
The first thing we will need is the Prism Launcher’s exe!
This can be found from this page of the PrismMC Website!
Then we just need to download the file and run it!
Follow through the prompts on the installer.
Note that the visual studio runtime makes Prism a lot more useful!
Note that the location chosen on this step is just where the launcher’s files are stored, not where the instances end up.
This may take quite a while to install.
You will also likely be asked for user account control permission a few times. Don’t worry, this is normal.
You will also likely be asked for user account control permission a few times. Don’t worry, this is normal.
Configuring Prism
Opening prism for the first time, you will be prompted for a few things. The first is your language (just the interface for prism itself, not your minecraft client).
You are also given a chance to choose your cat! (And some other visual tweaks).
This step is important! The minecraft account(s) you log in with are the ones you will be able to launch clients for!
Prism offers several ways to authenticate with your microsoft account. The easiest is probably the “sign in with microsoft” button, which opens ms’ account login website
This is just a standard microsoft login. Login with the same account your Minecraft account was created/migrated with.
You’re done!
Creating Your Instance
We’re ready to create the foundation for your Wynn instance! The first step is to create your instance.
We will be using the Additive modpack as the basis for this install, centred on the version Wynncraft is currently running
To get started, open prism and click ‘add instance’ (top left).
Ignoring the default page, go directly to the Modrinth tab of your new instance.
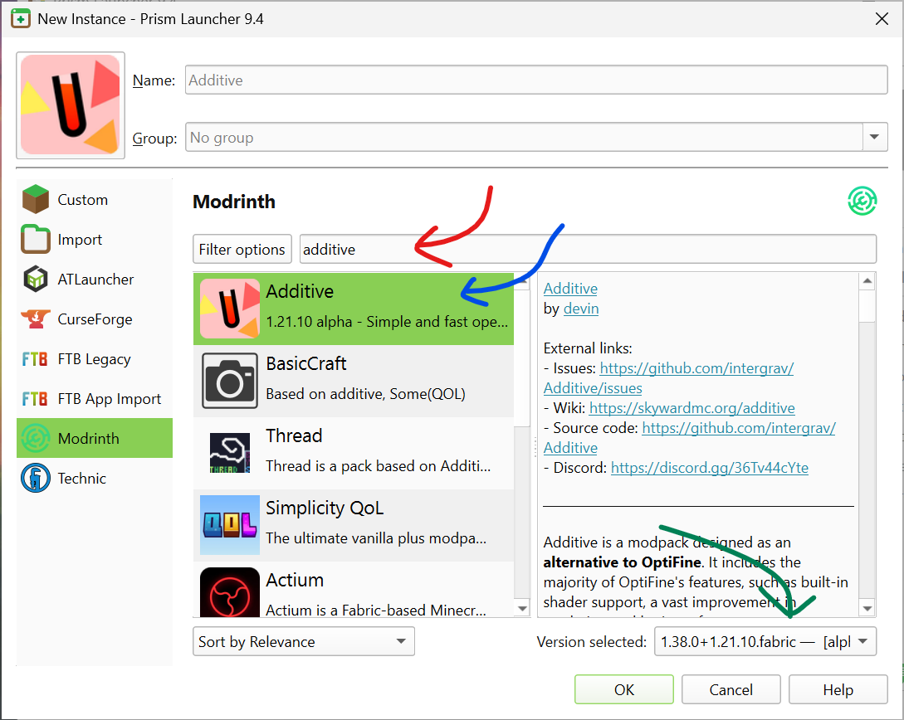
Search the modrinth page for the ‘additive’ modpack, click it, navigate to the bottom right, and click the version slider

Select whatever version Wynncraft happens to be running right now, and click the ‘ok’ buton.
Modding your instance
We’re ready to install Wynn mods! For the reasons outlined in the general notes section, although Wynn modpacks exist, it is generally preferable to install mods yourself.
How to add a mod to your instance’s ‘shopping cart’.

After giving it a few moments to install, right click on your newely created instance and click ‘edit’.
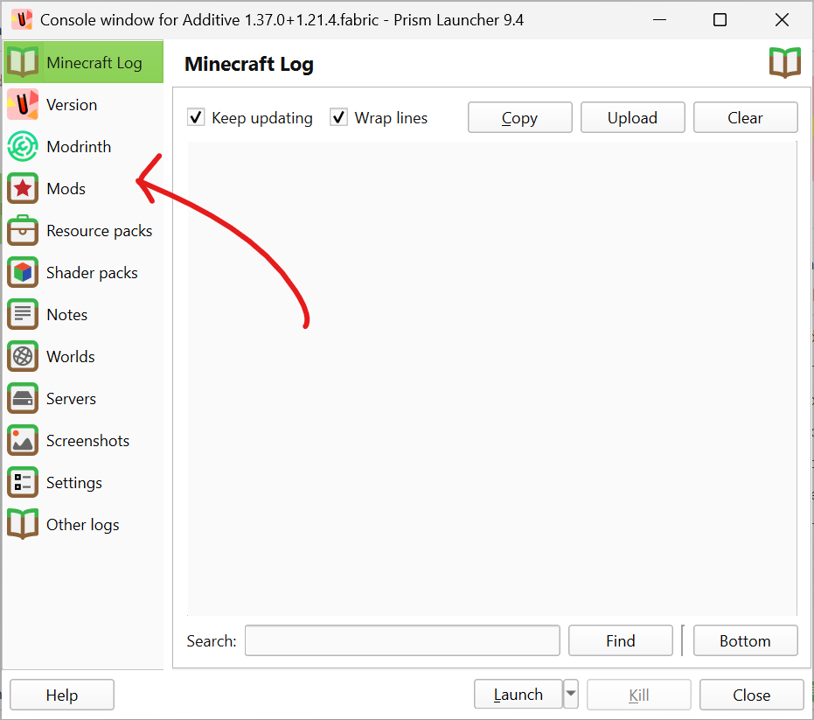
In your instance’s edit menu, click on the ‘Mods’ tab.
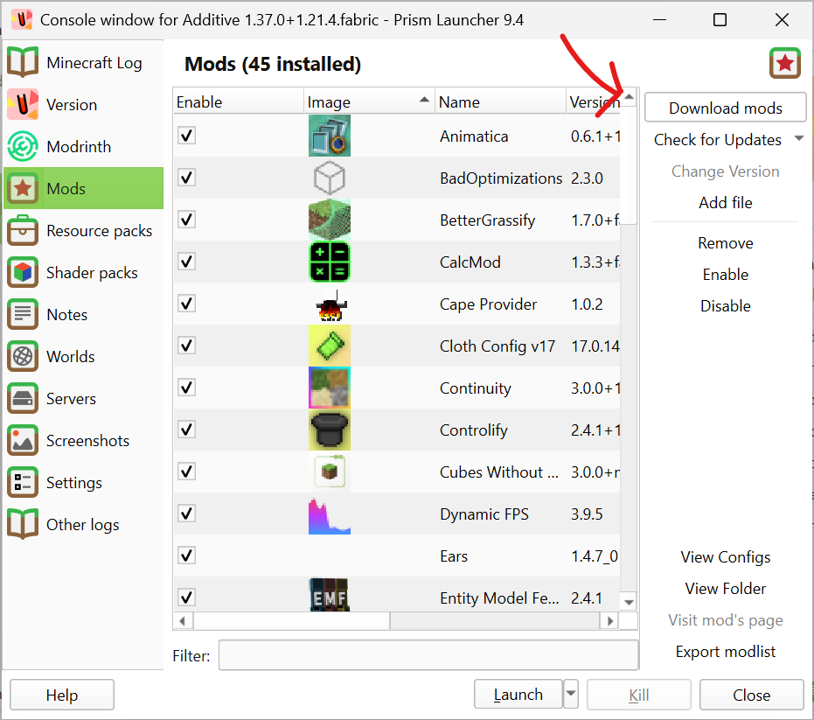
From within the modding tab, click ‘download mods’ button.
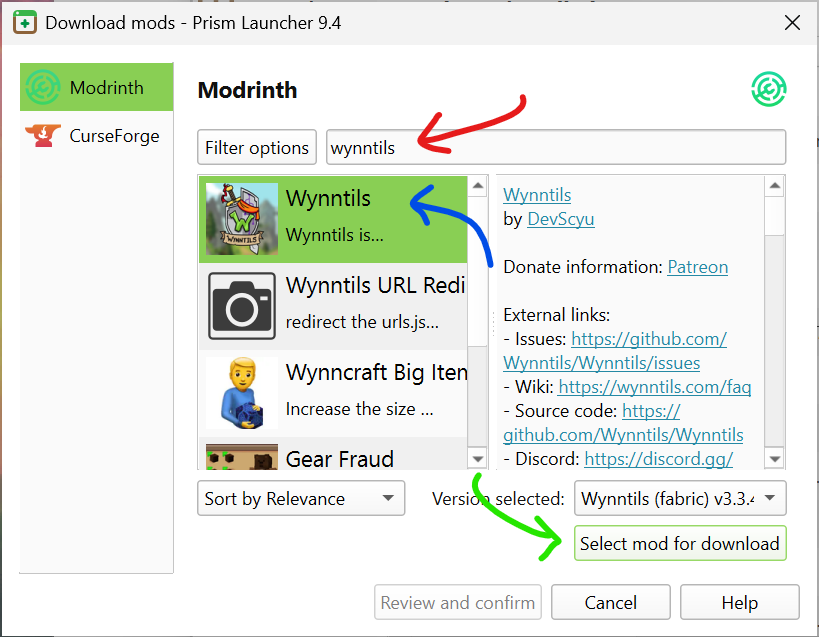
(red) Search for whatever mod you are adding to your cart, (blue) click it, and (green) select it for download (basically adding it you your cart).
Repeat this as many times as may be needed to install all the mods you are interested in.
Suggested Mods
This is your installation! Add anything you want! One of the best ways to do this is by simply typing ‘wynn’ into the mod search bar and adding the desired mods to your cart (i.e. selecting them for download).
Some specific mods we suggest are:
Dependencies
Although prism is generally pretty good at handling dependencies, a great many Wynn mods rely on a few specific resources. Therefore, we recommend installing:
Other mods to add to your cart
In no particular order, some of the more popular/useful wynn mods at the time of writing are:
- Wynnventory
- Shows market prices for items, among other things
- Distant Horizons (w/ WynnVista & WynnLODGrabber)
- Shows the entire world at the same time
- WynnAspects
- Keeps track of your aspects.
- WynnLimbo
- Makes queuing for worlds less annoying
- Wynncraft World Event Tracker
- Keeps track of when world events are happening, and where.
- Avomod
- Used primarily for wars, but adds several quality of life features such as consumable colours.
Installing your mods (i.e. ‘checking out’)
Once you have selected everything you need, click ‘Review and Confirm’
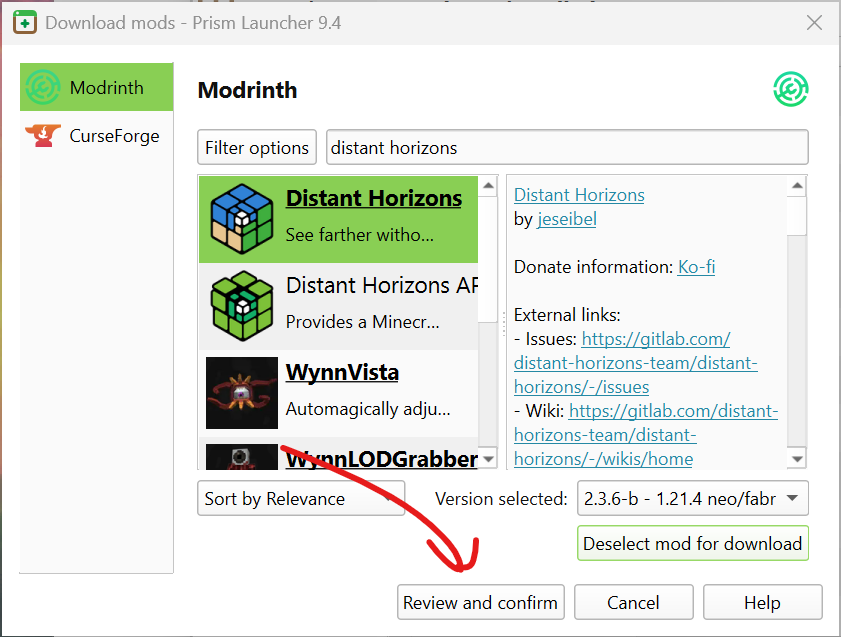
Once you have everything you need, ‘check out’ by clicking ‘Review and Confirm’.

You will be given a list of the mods you have selected; simply press ok to install them all.
Other Resources
We have the mods, but there are other ways to customise your client! Check out the Resource Packs and Shader Packs tabs as well!
How to add Resource & Shader Packs to your ‘cart’
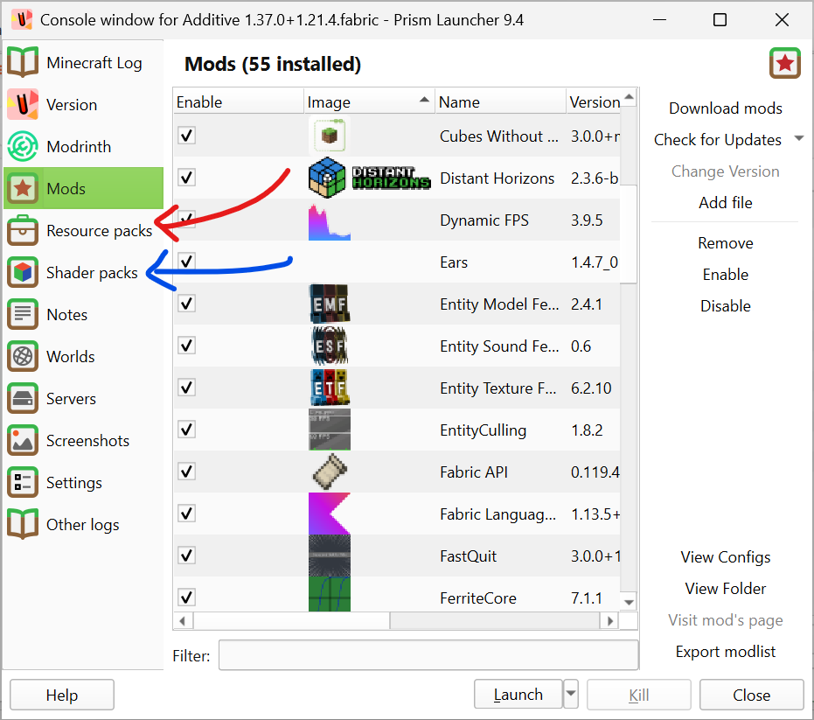
The resource and shader packs tabs function exactly the same way as the modding tab.
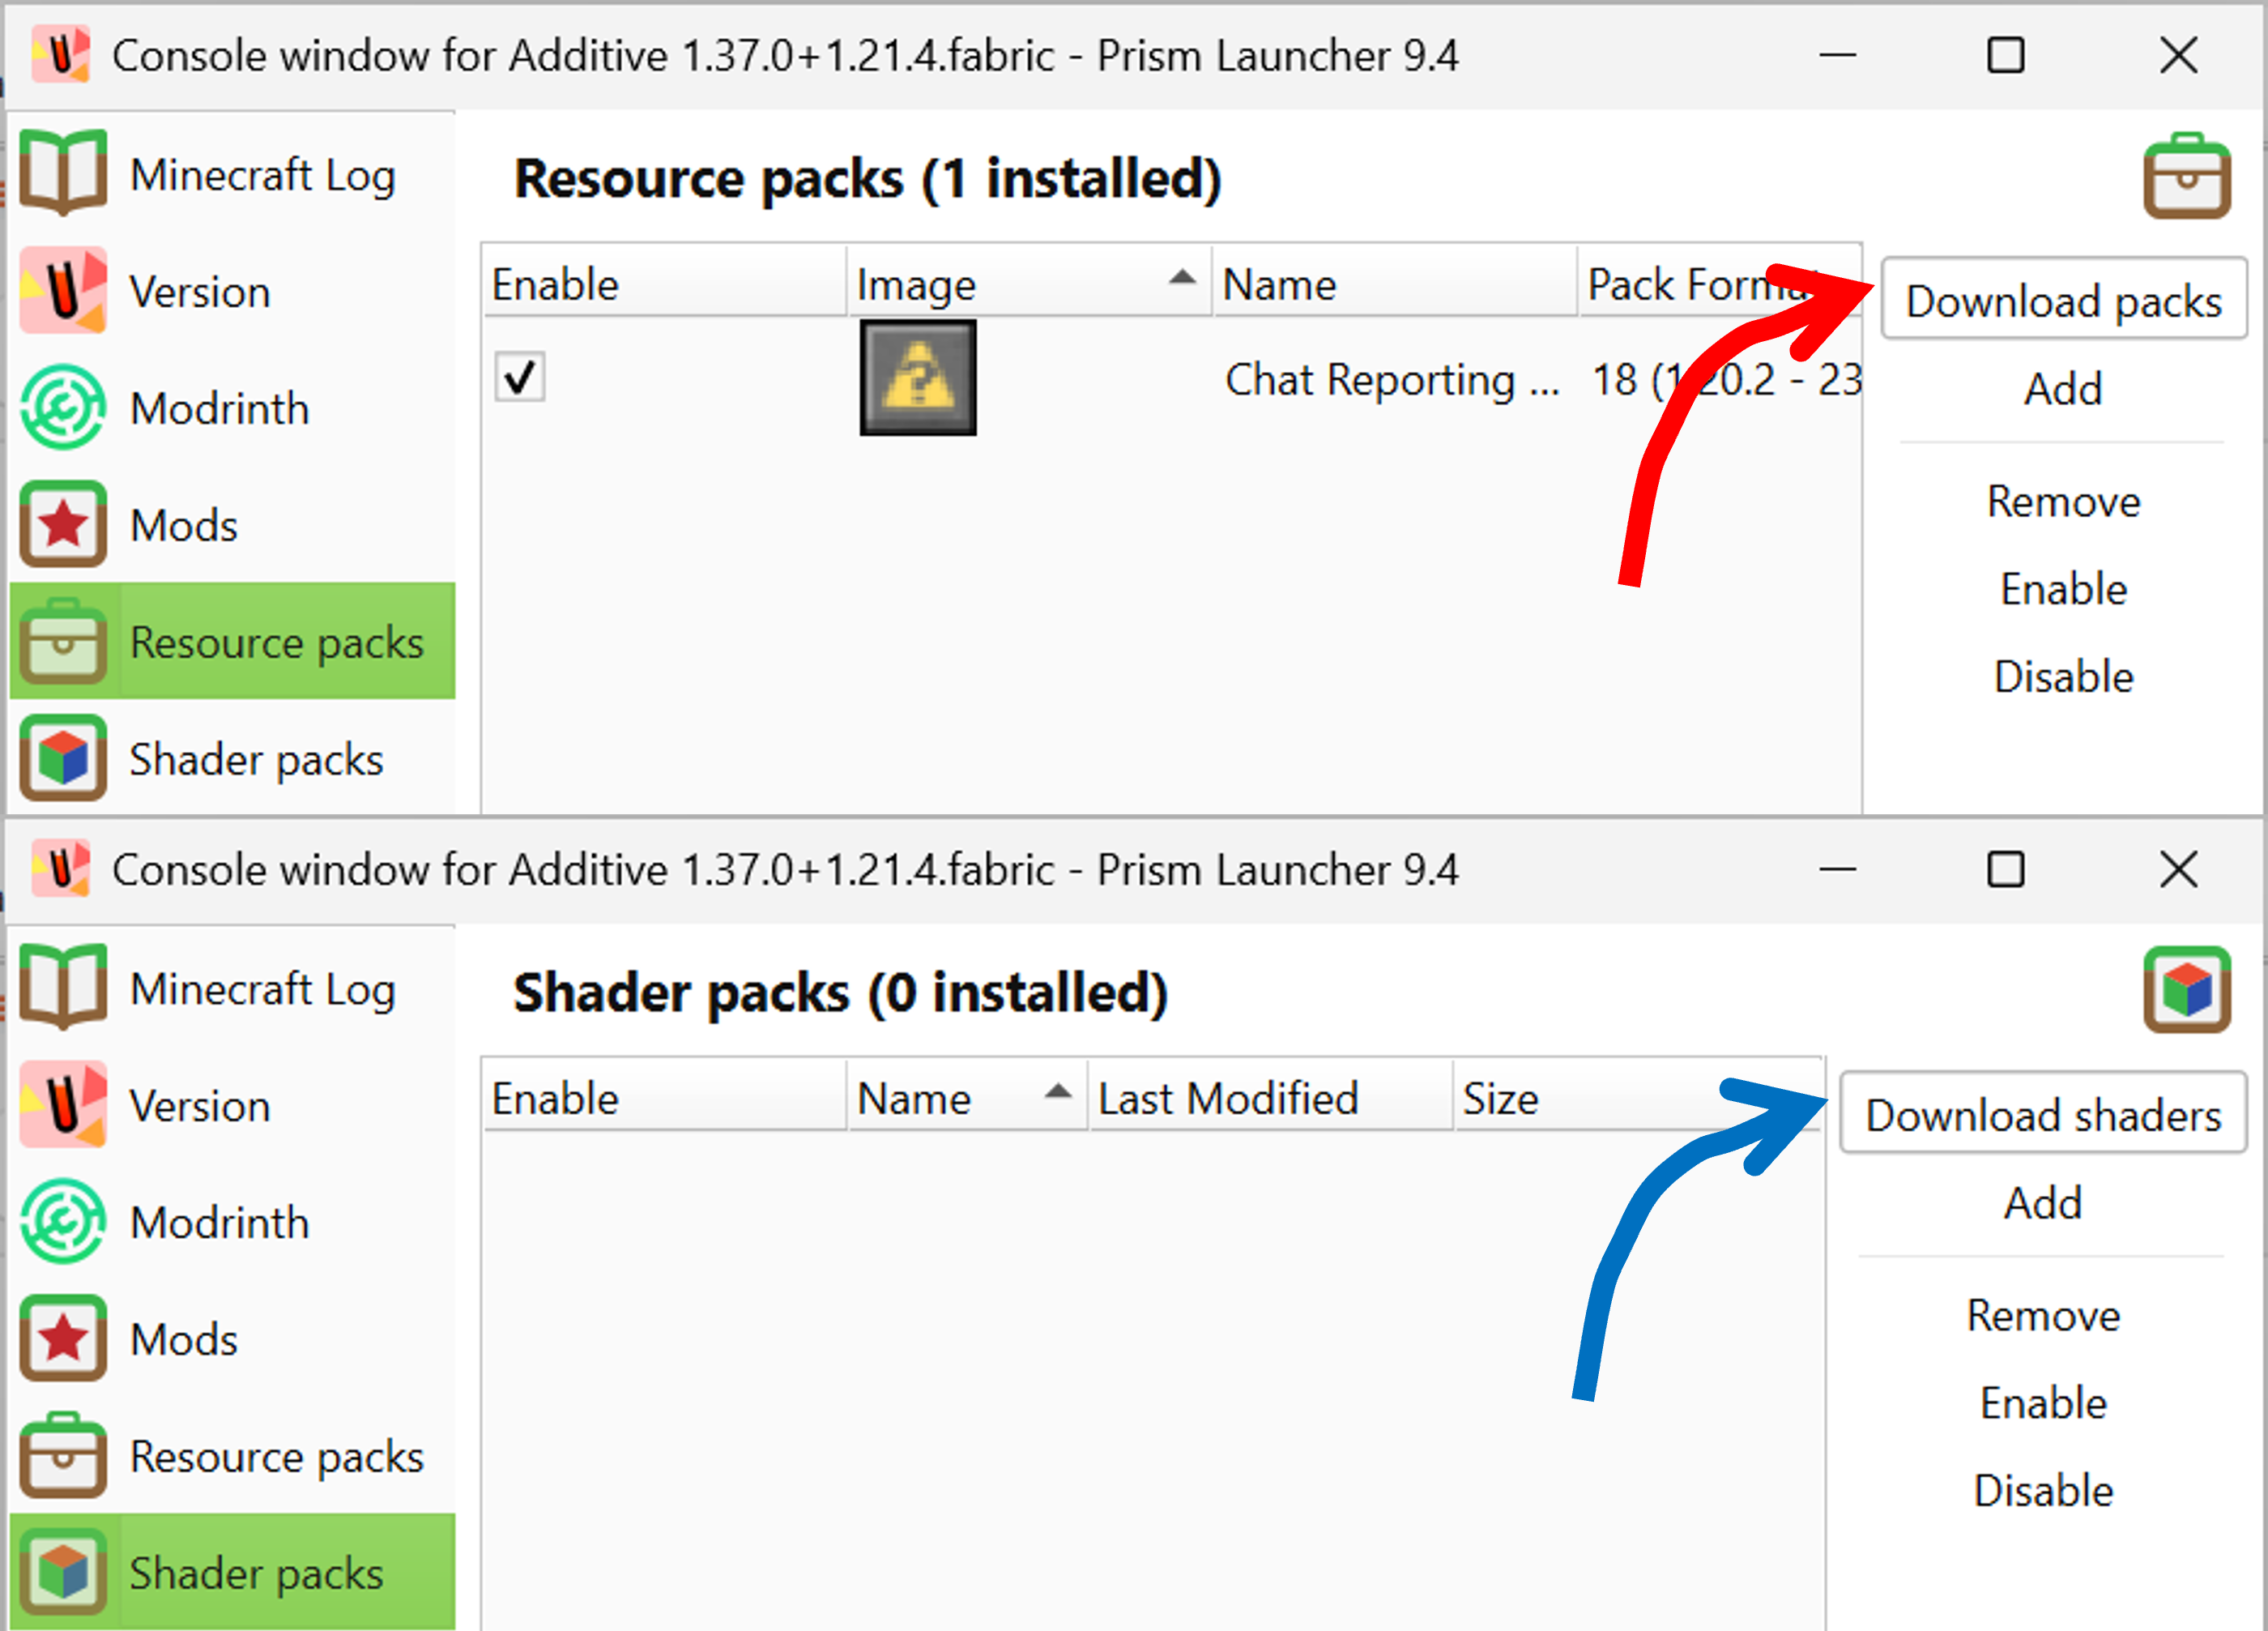
Simply click the ‘download’ button and repeat the same process from the modding section of this guide.
What to add to your ‘cart’
Again, this is a simple case of searching for “Wynn”. With that in mind, some specifically worthwhile mentions are:
Model (Resource) Packs
QOL (Resource) Packs
Launching
You are done! Feel free to launch your client!
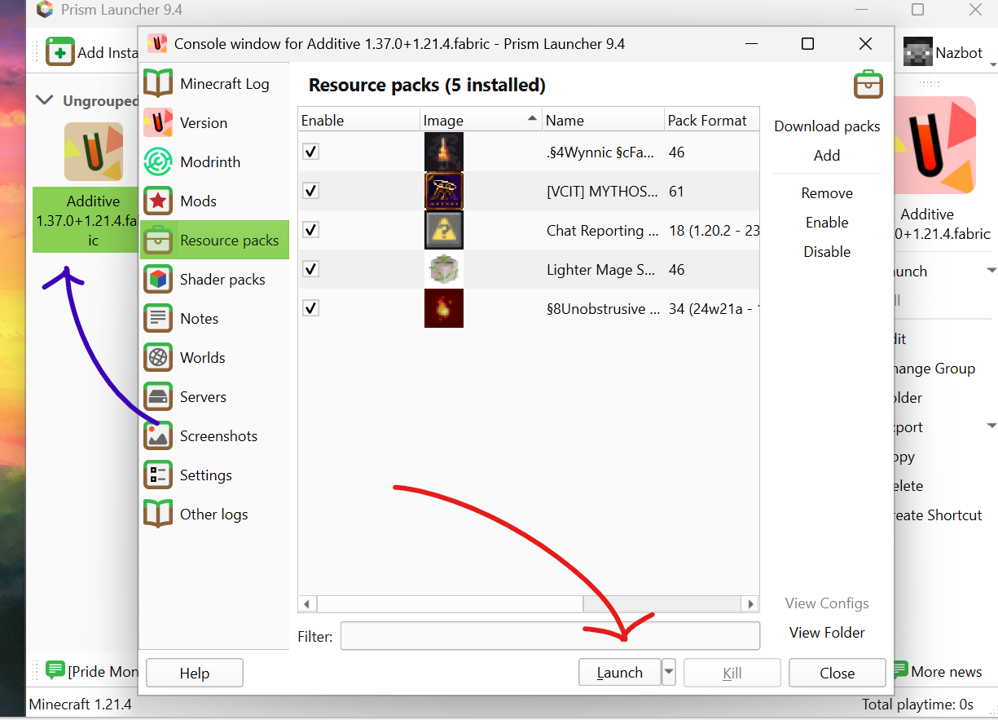
You’re done! You can click Launch (red) now; in future, you can also double click the client icon (blue) from your prism launcher to do the same thing!